
We'll cover the basic steps around how to tie a balloon. Learning to tie a balloon is a basic skill that can take a bit of practice! If you're just learning give yourself some time and you'll be ready to make gorgeous arches and garlands or even mosaics in no time. We also have a step by step guide on how to use a balloon tier tool which can be great if you're doing a lot of balloons!
Looking for more of a guide? Check out the video at the bottom of this post!
Balloon Display Inspiration
- Our Barn Balloon Mosaic Photo Backdrop
- Valentine's Day Balloon Garland
- Bonjour Bebe- a Parisian Themed Baby Shower
- Host a Kids Christmas Party

Blow Up Your Balloon
First things first- blow up your balloon. Try not to overfill it. If there's too much air in your balloon it will be hard to knot and also could pop easily.
Use a machine if you're making a big arch. The balloon filler is one of my favorite purchases ever! You can even do two balloons at a time if you have helpers around.

Tying your Balloon
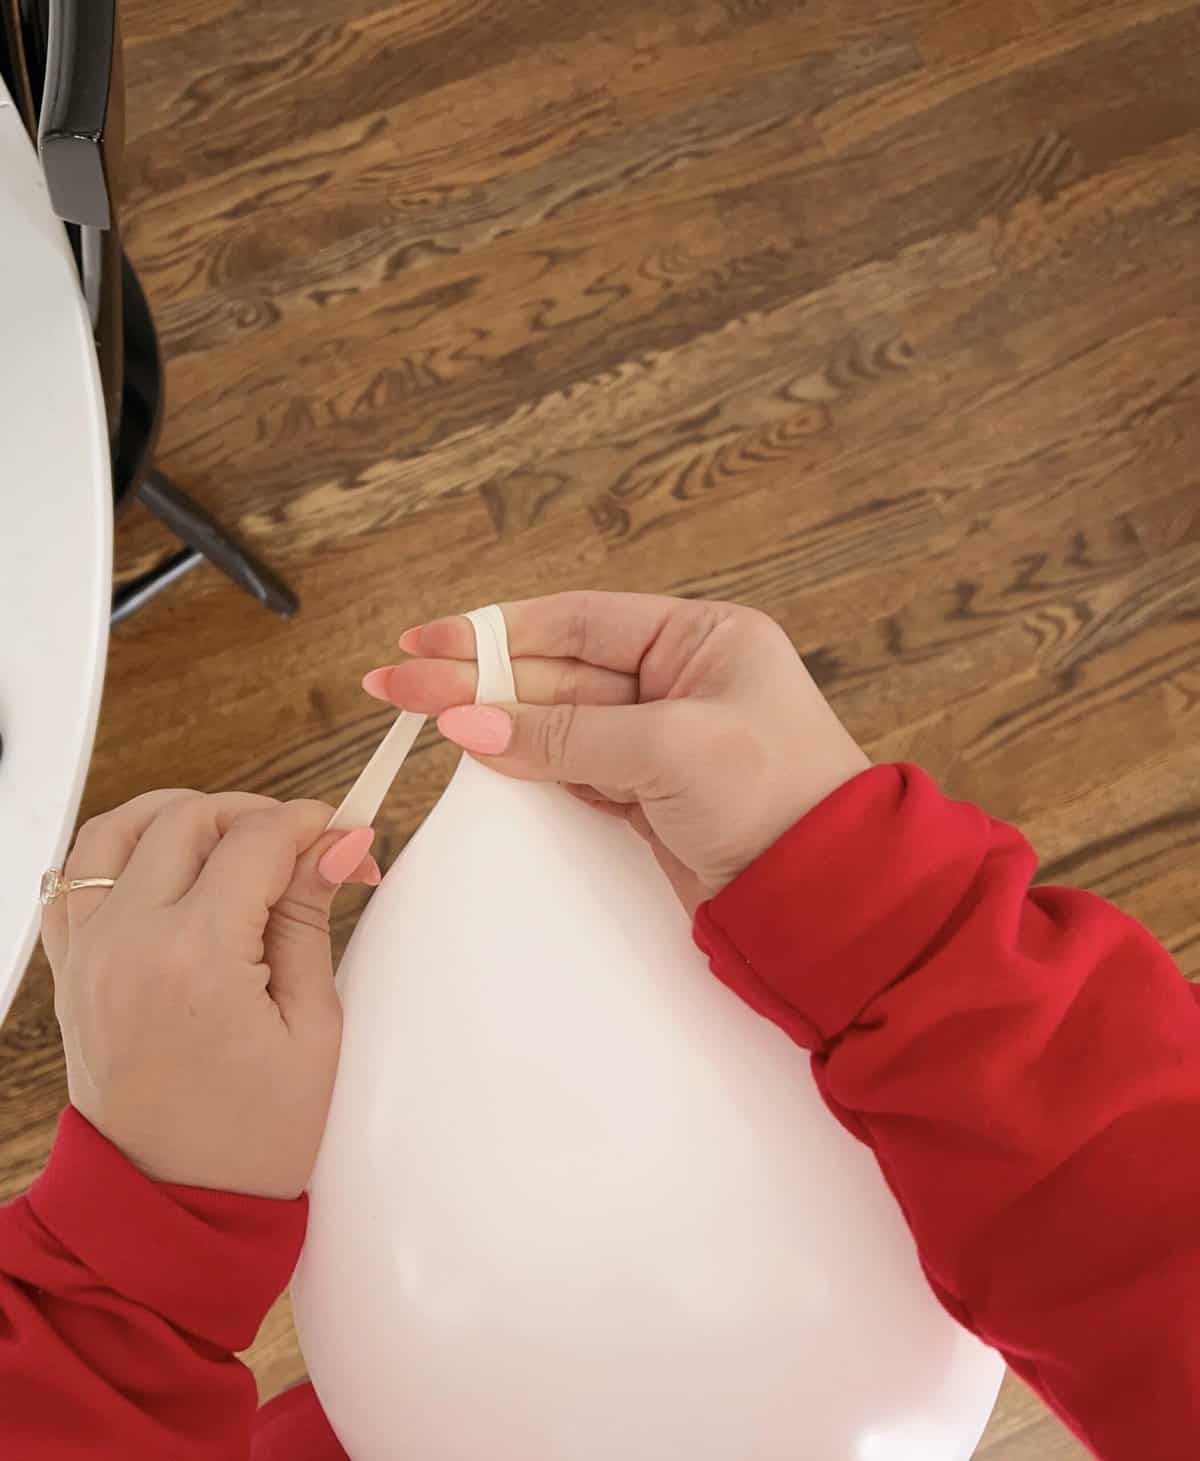
After you've blown up your balloon, it's time to learn how to tie a balloon! Pinch the neck with the hand closer to your body together so it stays inflated. Stretch out the 'neck' of the balloon, you want about 4-5 inches of the latex stretching easily. I usually hold the balloon by the base with one hand and stretch out the neck and hole (sometimes called the lip) with the other. Making sure you have a decent amount of stretch left ensures you can wrap it around two fingers.
With your fingers facing up/towards your face, pull out the neck and wrap the neck of the balloon around two fingers, wrapping away from you and behind your fingers. You're twisting it around your fingers to make a loop, without catching any of your other fingers.

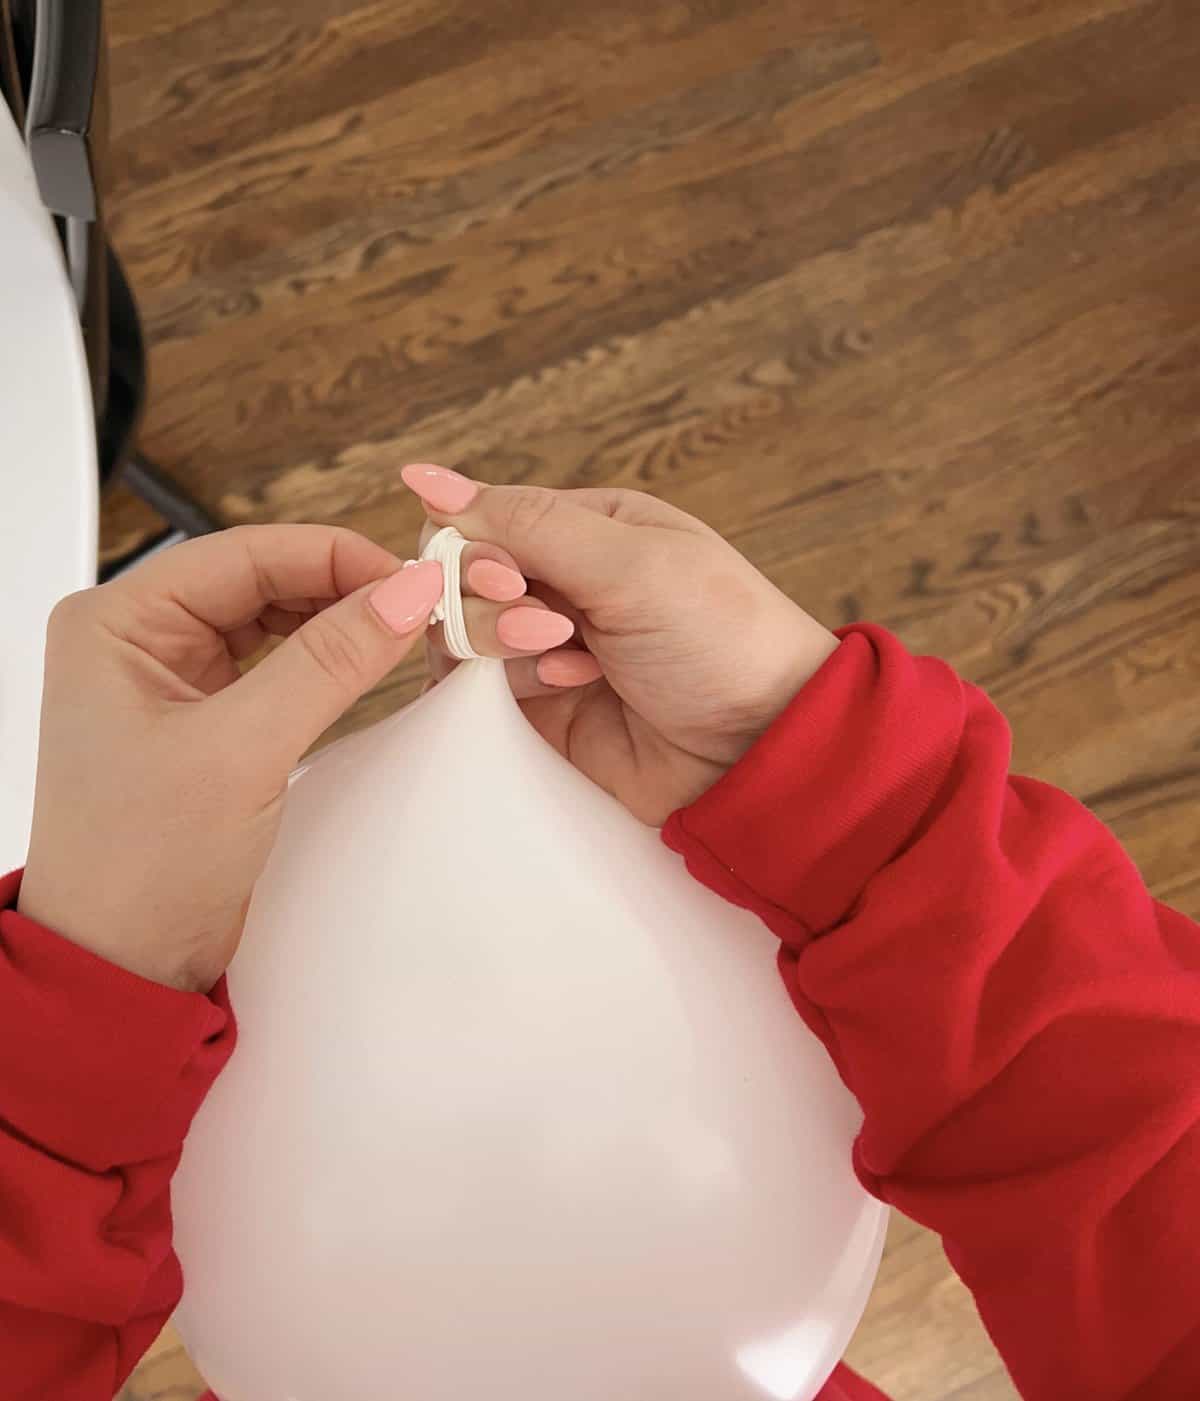
Once you've completed the loop, hold the balloon against your body, and turn your fingers so your nails are facing towards you. Don't wrap it too tightly or it will pinch your fingers. This is why I recommend switching to the tool tie method if you're doing a lot of balloons.

Pull what's left of the neck of the ballon and hold the top of the balloon or the 'lip' with one hands. Start to tuck the lip of the balloon under your loop.
Tying the Knot
Take the lip or top of the balloon and twist it fully under your loop. Using one hand, pull the lip through the loop at the same time as you remove your two fingers from the balloon's neck. This is like tying a basic knot.
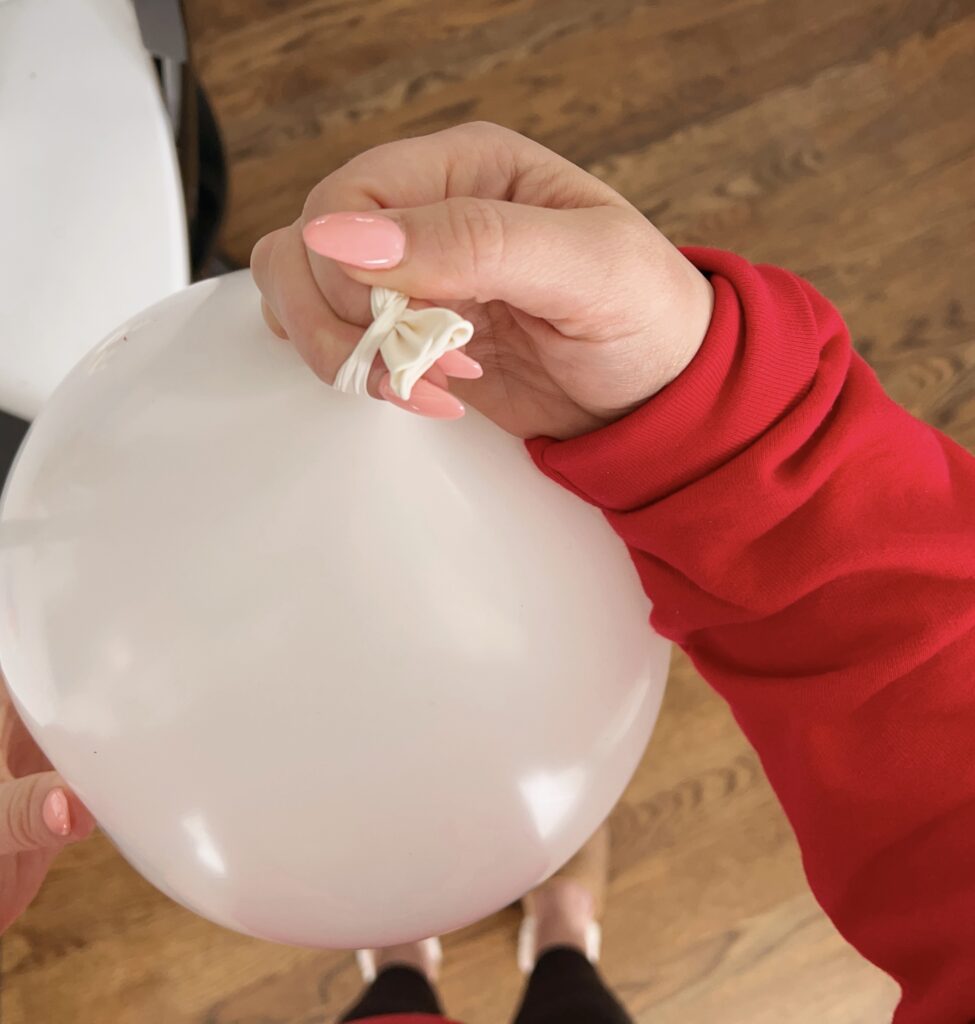


After you've pulled your fingers out of the neck and the knot has been formed you've tied your balloon! Stretch out the neck to test its secure. Repeat for as many balloons as you're going to be making or using!


Leave a Reply