
Balloons just seem to make everything more fun. They have such a big impact and can really set up a focal point for your party. I've seen several balloon mosaics that are numbers and letters, so when planning out my son's second birthday party I knew I wanted to try to incorporate one! Our theme was 'Two the Farm,' and when I found a template for a barn balloon mosaic I knew it was going to be a focal point for the party!
Balloon mosaics aren't intense from a DIY skills perspective, and they can be super affordable. It varies a bit what supplies you have on hand, but I made this 4ft balloon barn for right around $30-$35. You do need to commit a decent chunk of time to it. I worked on this after bedtime in the evenings and probably put in a total of 4-6 hours.

How to plan a balloon display
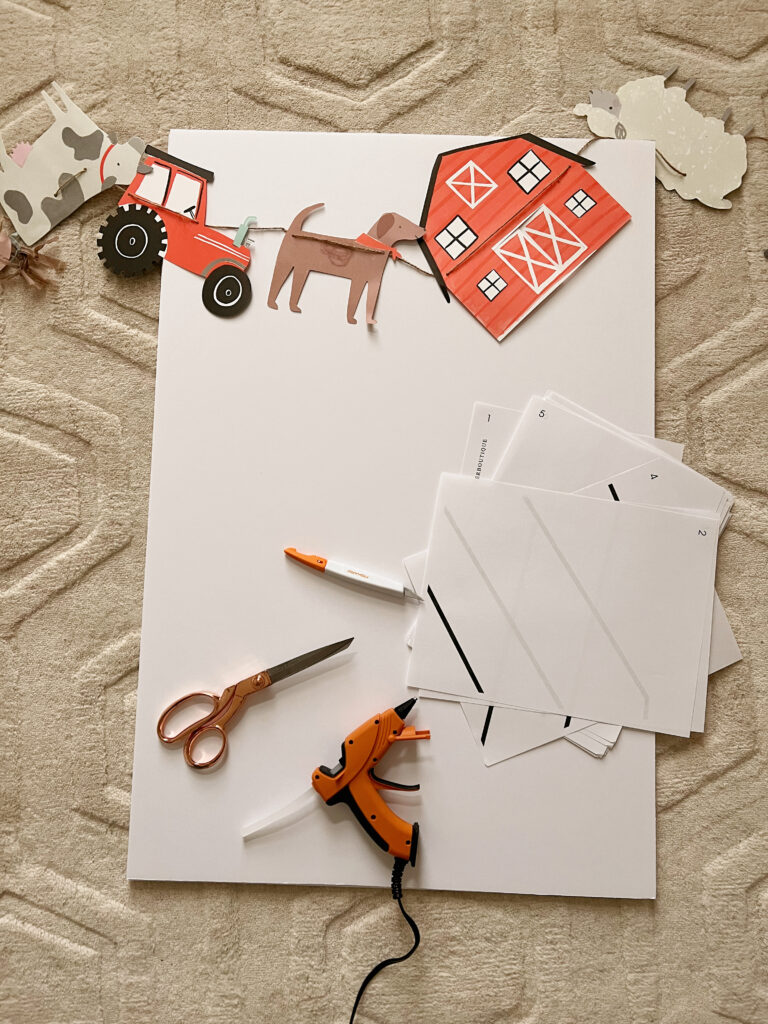
The first thing to do is pick your template and print out your guide. I purchased this barn balloon mosaic template and do not have instructions for making your own template. I think there are a lot of great sellers on Etsy who are more skilled in this area and can even make you something custom! The instructions should tell you approximately how many pieces of foam board you will need. I doubled this and purchased extra knowing that it was my first time trying this, and they were only $0.77 a piece, and if I really wanted to I could return the extra pieces.
Tips for cutting the boards
- Pre-cut as much as possible. One thing that would have saved me a bunch of time was cutting as many strips ahead of time so that I would have had a pile of 5" boards to work from. Then you can make your other cuts for the various lengths you'll need.
- Use one perfect piece to measure the rest. This way the boards will all be uniform in width.
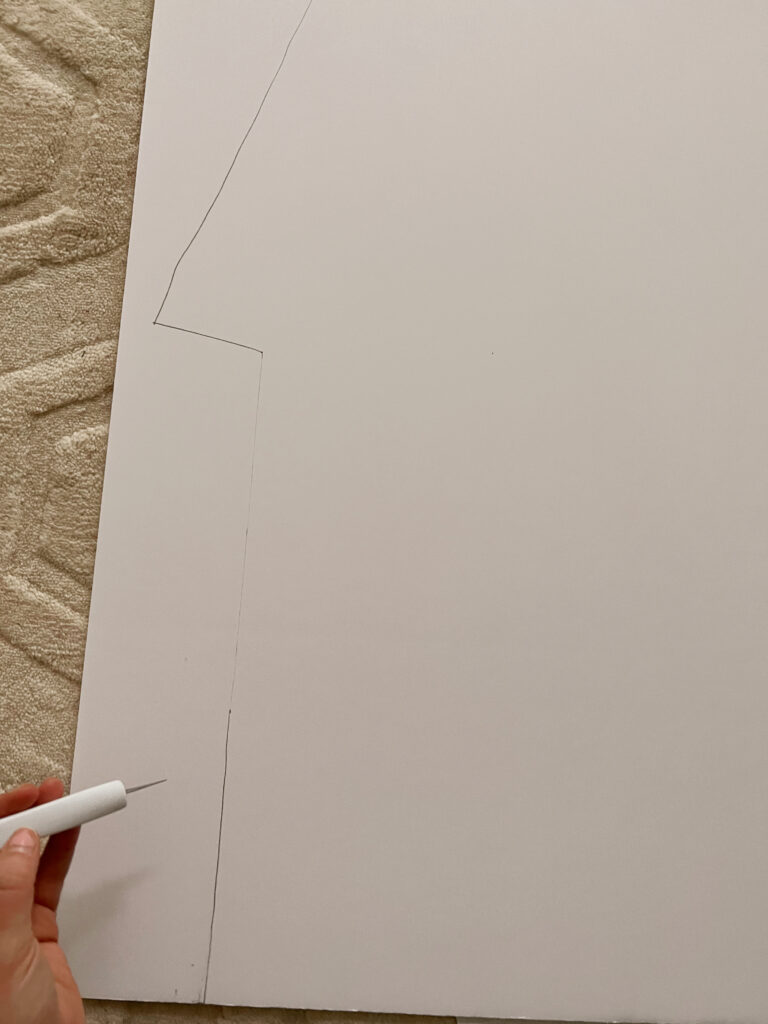
- If you have any curves in your mosaic you will need to score board to help round the corners. This means you cut the strips partially through the foam board so that the can bend around to hold the correct shape.
- Using an x-acto or utility knife to cut the board on a flat surface is the easiest way I found.
Building the Barn Balloon
The backing of your mosaic is compiled of a few pieces of foam board. I'd recommend using white duct tape to secure the pieces together so that it's not super visible through the balloons. To keep your foam board pieces together, use a hot glue gun and hold together for 30 seconds to a minute until secure. Follow the outline of your template, keeping in mind that most of the small balloons are 5 inch in size, so make sure if you're glueing down the roof line or the barn doors you need to leave space big enough to fit your balloons.
Assembling the balloon mosaic


When putting together you foam boards, you need to print your template and place together the exterior pieces together, following the template design. There are templates for various sizes available, you will need your duct tape and hot glue gun. I did end up using some extra white duct tape to secure the top of the barn together.
Attaching the balloons
There are a few different ways to attach the balloons to the foam backing itself. I tried both glue dots and my hot glue gun set to a low temperature. The glue dots did not hold as well as the hot glue, in my experience. If you’re going to use hot glue be super careful and make sure you’re using a low temp. Hot glue gun burns are no joke and can be super painful or serious. This may vary depending on your type of balloon, but I'd be prepared to play with it a bit and find what works best for you. I used about 100 red 5 inch balloons, around 40-50 white 5 inch balloons, and approximately 15-20 5 inch black balloons. I also used a whole package of mini hot glue sticks(this is the glue gun and the glue sticks I have) between the structure and adding balloons for my 4ft mosaic.
If you plan on making balloon arches or mosaics, it's worthwhile to purchase an electric balloon pump to blow up the balloons. This will save you so much time. Melanie actually introduced me to this handy little tool!

Securing the Mosaic
For the 'Two the Farm' birthday party we ended up using floral wire to wrap it to the deck post in our backyard. It can be freestanding, but it's best to have it supported somehow. You could also create a stand for it with additional foam board that you attach to the back.

If you have any questions be sure to drop them in the comments! Can't wait to share more from our Going 'Two' the Farm backyard party!
Looking for more birthday and party inspiration?
- Rookie of the Year First Birthday
- Make a Fun Breakfast with Pancake Shapes
- Baby in Bloom Baby Shower

Barn Balloon Mosaic
Equipment
- 1 x-acto knife or utility knife
- 1 Pair of scissors
- 1 printer or access to having paper printed for your template
- 1 hot glue gun optional, you can use glue dots as an alternative
- 1 balloon machine to blow up balloons. Optional, but highly recommended.
Materials
- 7 pieces foam board this will vary based on the size of mosaic you're making. I used 7 for the 4ft barn and had extra pieces.
- multiple pieces of paper to print your template. Follow template instructions.
- 1 package hot glue I used an entire pack
- 1 pack 100 5 inch red balloons Or in your preferred color. Having extra allows some to pop or blow off.
- 1 pack 10-20 black 5 inch balloons or in preferred color
- 1 pack 50 5 inch white balloons or in your preferred color
- 1 piece floral wire optional, to secure after assembly
Instructions
- After purchasing or creating your template, print it and use to lay out your design.
- Cut your foam boards into 5 inch strips.
- Following assembly instructions, tape together the back of your mosaic and cut then glue outer pieces together. This part can be tedious and is why I recommend cutting all your foam board strips before starting. You have to make additional cuts but you can work faster.
- Fill up your balloons, do not overfill. I would fill a few and see how they look/fit on the structure before completely using all of your supply. I found the small white balloons needed to be a bit smaller.
- You'll also want a mix of slightly larger and smaller balloons to give the mosaic depth and to fill in any holes in the design.
- Using your hot glue gun on it's lowest setting, apply to balloons and fill the display.
- Use your smaller balloons to fill in any gaps.
- If securing to a post, fence, etc., use your floral wire and a command hook to loop it around and tie off so that it doesn't blow over.


Elisabeth says
Making one of these is such a fun idea!