
Tying a balloon is a skill that comes in handy for all kinds of projects, parties and events. Balloon garlands and arches have become such a staple decoration at showers and birthdays- we even made a ballon barn mosaic for my son's second birthday party! Learning how to use a balloon tie tool can help save time and your fingers from getting blisters if you're tying lots of balloons! No tool? You can either buy one or tie a balloon the traditional method with your fingers with help from this post.
How to use a balloon tier is so simple. It's harder in your head than in reality. If you'd like a video guide as well check out the bottom of this post!
Balloon Inspiration
- She's Been Scooped Up Bridal Shower
- Lemon Themed Bridal Shower
- Host a Kids Christmas Party
- Hosting Friendsgiving
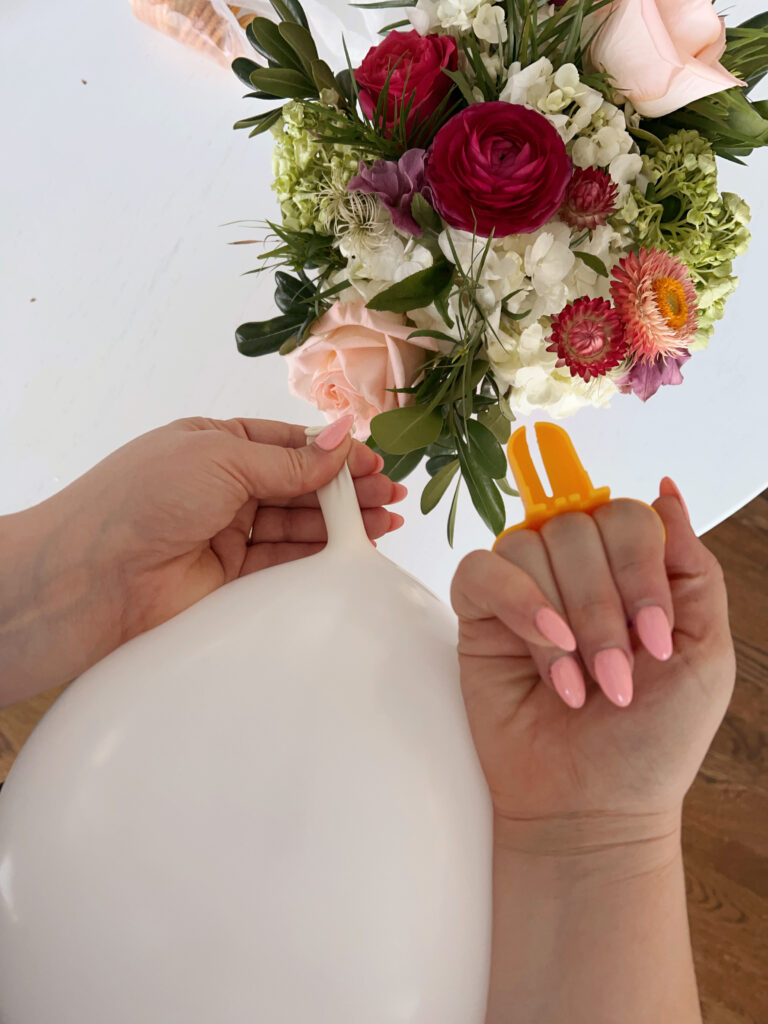
Step 1
Start by inflating your balloon. You can blow air into the balloon or use an electric balloon pump. I used to use a hand pump but once I was introduced to this electric pump it was a game changer! Pinch the neck of your balloon so that it holds the air and hold the inflated part of the balloon against your body.

Step 2
Put the tier tool on 2 or 3 fingers, with the large part facing away from you and the slit/open part facing toward your body. Wrap the neck of the balloon behind the balloon tier tool, away from your body.

Step 3
Loop the neck of the balloon fully around the tying tool. Bring the neck of the balloon back around the tool towards you. Make a second loop but don't go all the way around.

Step 4
Slide the lip of the balloon under the wrapped portion of the balloon neck, creating a knot. Begin pulling the knot through to release the balloon from the tool.

Step 5
Finally, remove the knot fully from the balloon and you'll have your fully inflated and tied balloon really to go! Check out this video for more help using this easy tool! It really does help your fingers not to get squished and makes the process of blowing up dozens of balloons much faster!


Leave a Reply