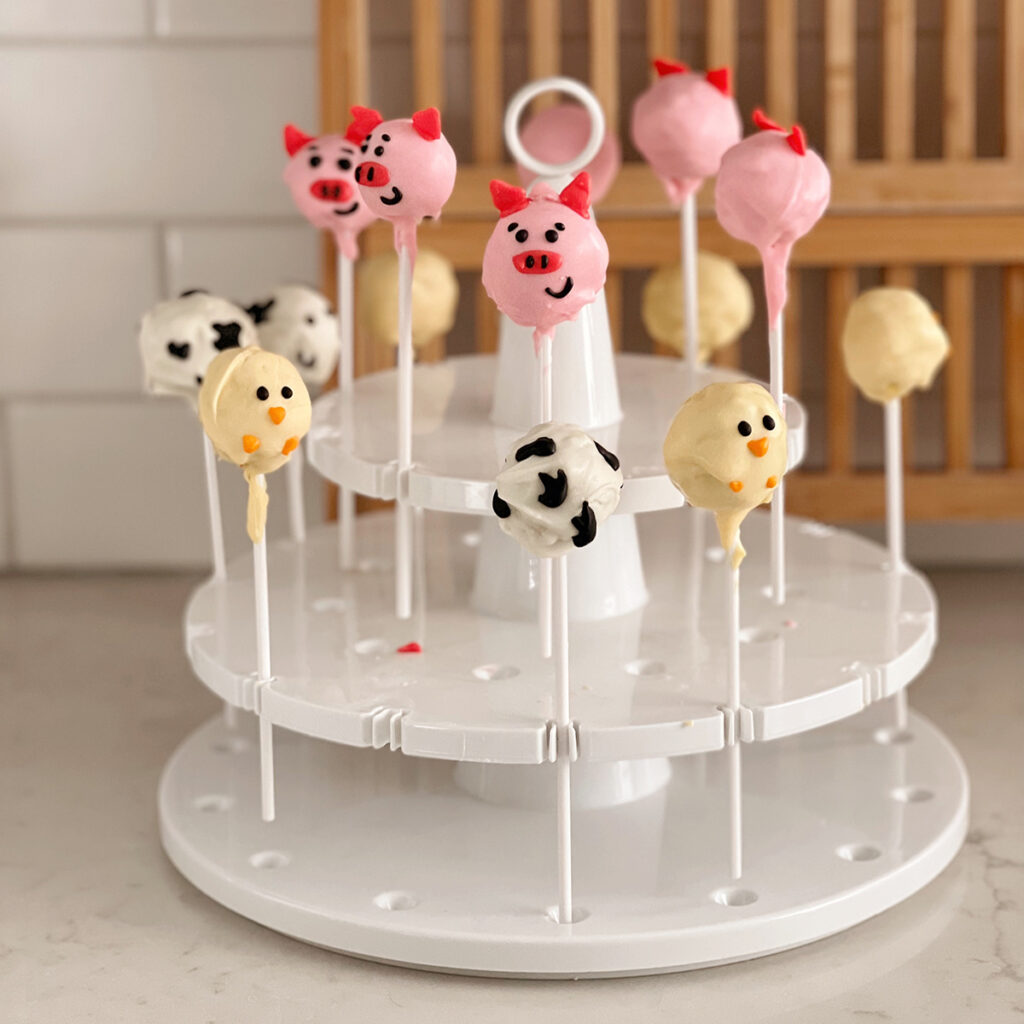
Is there anything cuter than a farm-themed birthday party? What if you add farm animal cake pops? Cake pops are such a fun and easy treat that adds just the right amount of sweetness to your dessert table. I do want to mention right off the bat that to decorate them like farm animals you do need a royal icing recipe or an edible food decorating pen.
In the past I've made both pastel and football cake pops, so I thought I'd be up for making barnyard animals for my son's birthday. Cake pops are really just cake and frosting combined, and put on a stick dipped in chocolate. They're also the perfect size to enjoy as a little taste of dessert if you have a lot of sweets at a party and don't want a full piece of cake.
Instructions
- Bake your cake, following the box mix instructions or from scratch. I like to use the Pillsbury Funfetti mixes because I like that flavor and how festive they are, but you can use any flavor or brand of cake mix.
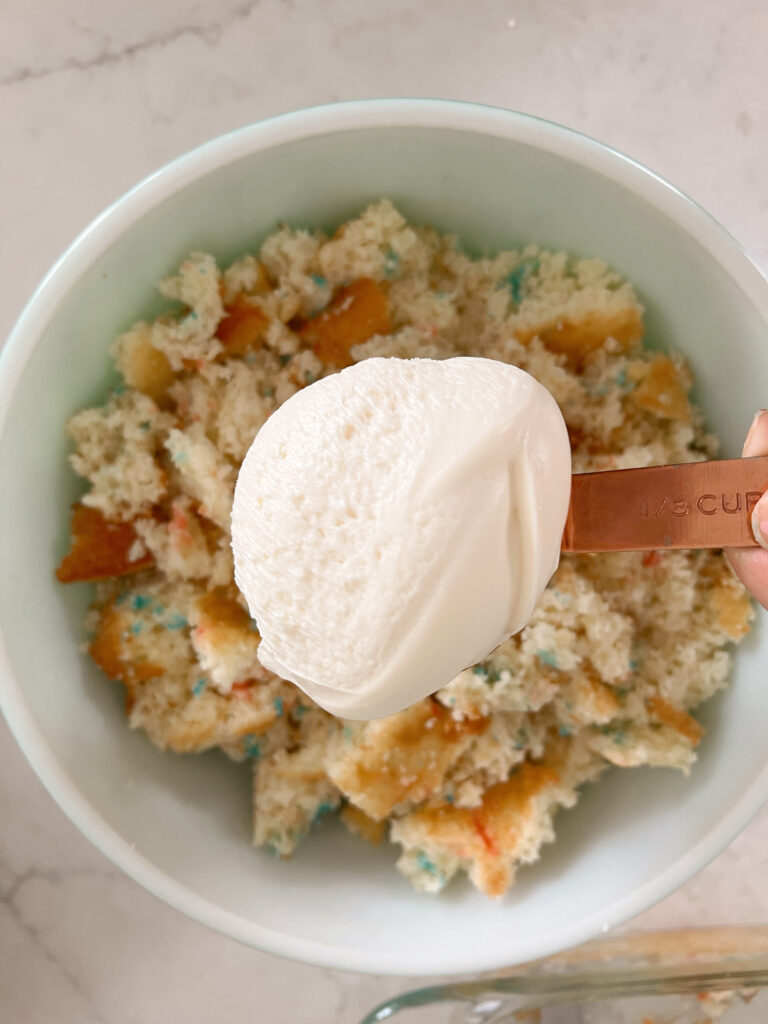
- Combine your cake with frosting and crumble together with your hands. You can also use a variety of frosting flavors or whatever your favorite is.
- Roll your cake mixture into balls. I place them in muffin tins to help them keep their shape. At this point you can either begin to dip them or freeze them for decorating later. Either way, you want to flash freeze or chill them for a few minutes before dipping into your chocolate.
How to Create the 'pop'
- Melt your chocolate wafers in 20 second increments.
- If you're adding colors, add your food color. I like to use gel food coloring because a little goes a long ways, and it's easier to control how much is added to the chocolate.
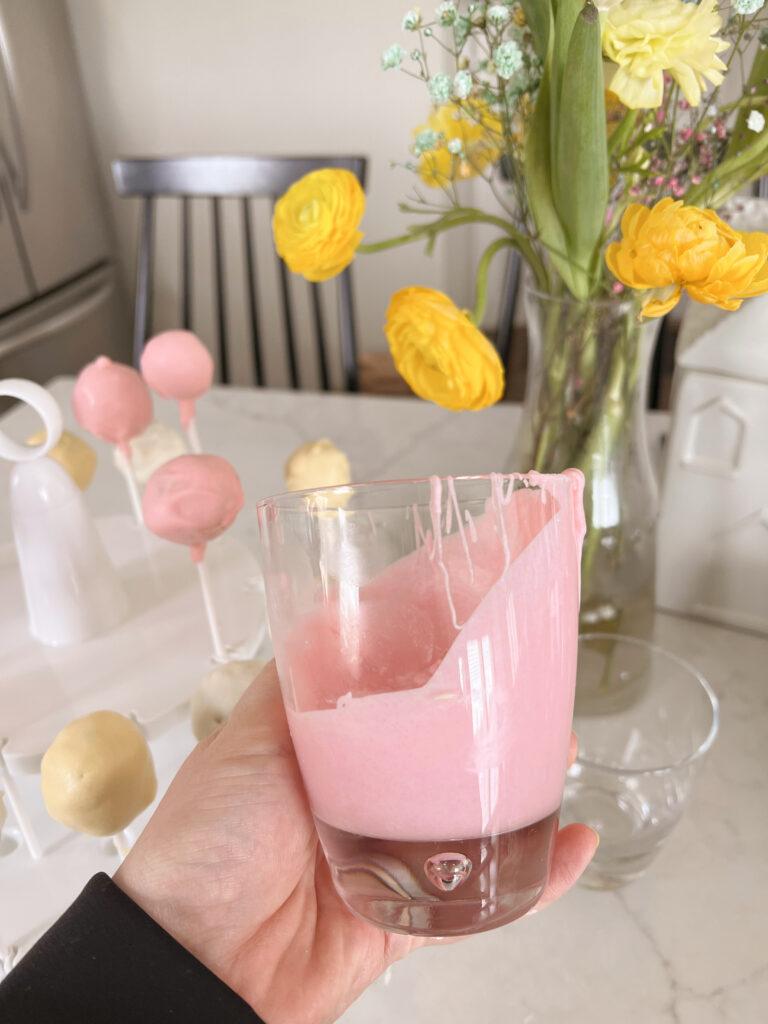
- I recommend adding the melted chocolate into a small drinking glass. It is easier to dip a cake pop into a glass, and when you dip it you want to be able to submerge it.
- Dip your stick into the chocolate, it acts as a sort of glue between the cake ball and the stick.
- Add your cake dough on the stick and dip in chocolate, fully submerging it. Pull it out and let the excess chocolate drip off.
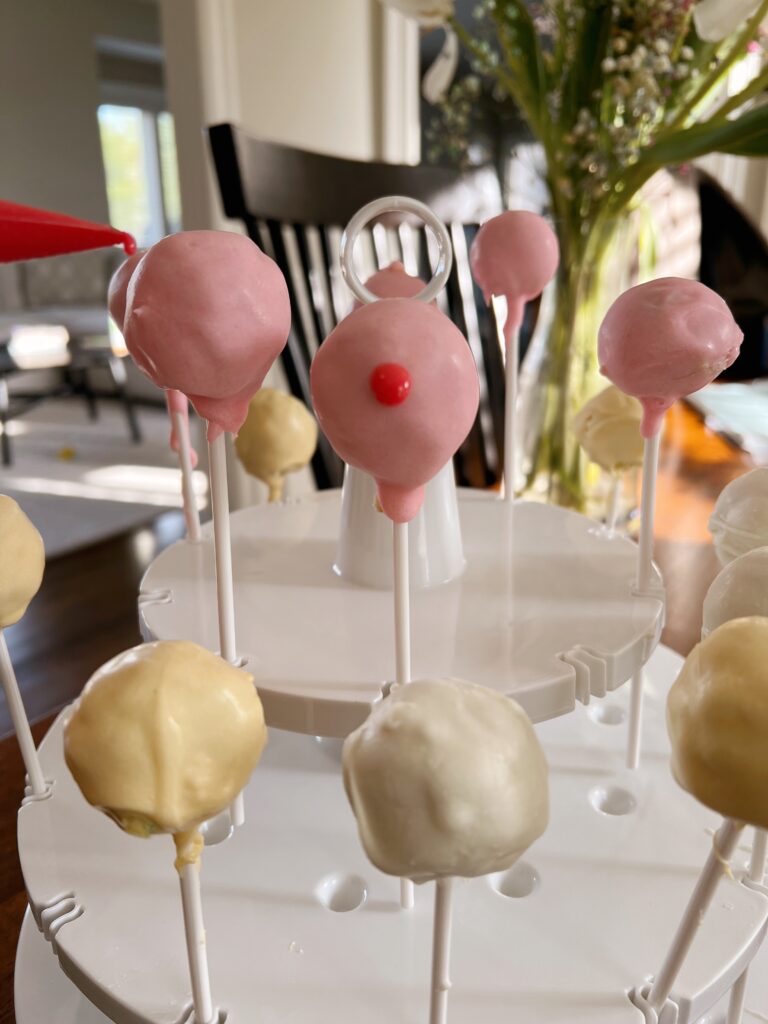
- Place into a bowl of packed sugar or your cake pop stand to harden.
Decorating
I had also made farm animal sugar cookies for the party, and I was able to use my leftover royal icing for the farm animal ears and faces. You could make these with an edible pen or with extra melted white chocolate as well. I found royal icing to be easier to work with for this application, and since I'm comfortable with royal icing this is my preferred method.
How to Make Royal Icing Transfers
Royal icing transfers are simply icing designs that you make on parchment paper that you allow to dry. To make the farm animal pigs and cows I made pink and black ears with royal icing, allowed them to dry and then adhered them to the chocolate with additional royal icing acting as glue. You want to give the transfers a few hours to dry so that they don't break apart. I usually peel up the parchment paper so they pop right off to make sure they're ready to go.
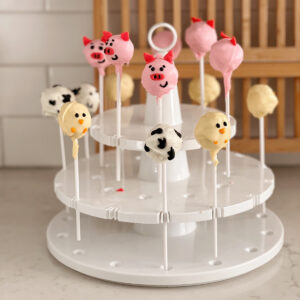
To decorate the cake pops I used royal icing to add eyes, a snout for the pig, a beak for the chick and spots for the cow. It took about 10 minutes and added a lot of character to the little creations!

Chick Cake Pop
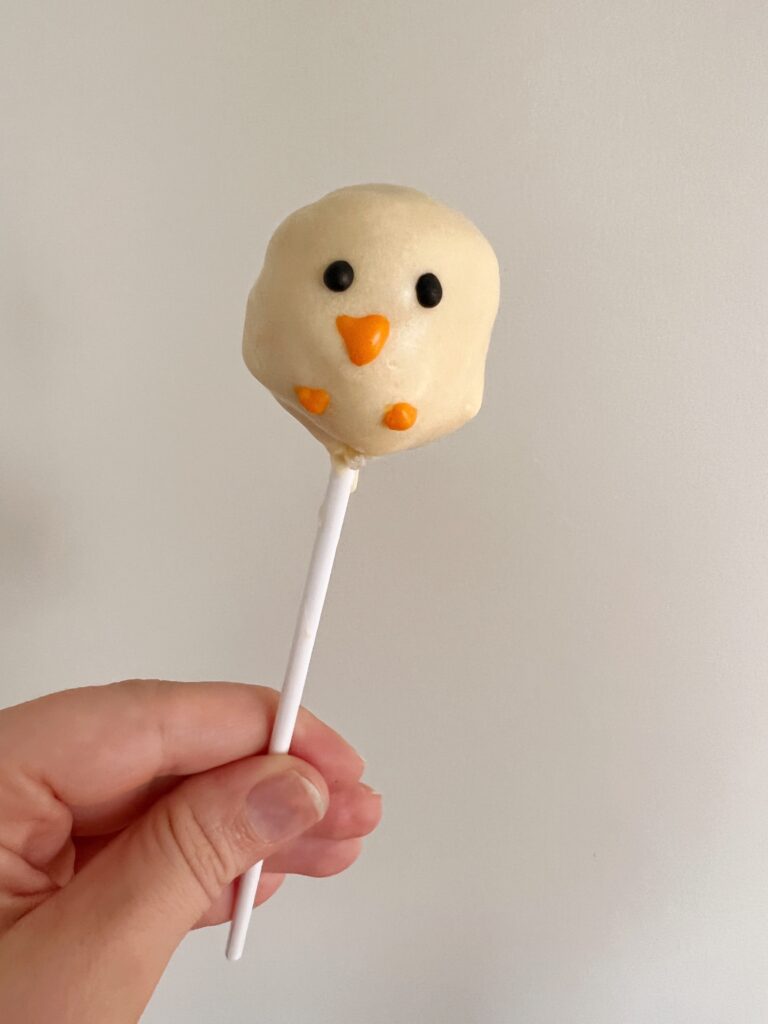
To make the chick you need yellow chocolate, a bit of orange royal icing, and black icing or marker for the eyes. Dip your cake pop in white chocolate melted, then add your yellow food coloring to it. Submerge your cake pop. Once the chocolate has dried use your royal icing to add a little beak, feet and then using your black icing add eyes. Tip- I would make a lot more chicks than cows or pigs... they're a bit simpler and you don't have to add ears!
Cow Cake Pop
The cow needed spots, ears and a smile to be ready for the barnyard bash. I used black royal icing to add the spots and face. I tried white ears, but ended up making additional black royal icing transfers for the ears. A tip for black royal icing- combine whatever colors you have and add as little food coloring as possible. With black a little goes a long ways and it doesn't have to be completely black to appear black.
Pig Cake Pop
The pig might be my favorite. To make the pig I started with a pink chocolate cake pop, then added a snout with bright pink royal icing. I used a pink royal icing transfer for the ears. Once it had completely dried I used black royal icing to draw links on the ears and to put two lines on the snout. I also added eyebrows and a smile to make sure it was a cheerful pig.
Tips
- Make them ahead of time. The days leading up to my son's 'Two' the Farm birthday party were going to be super busy, so I made these cake pops about 2 weeks in advance. I froze the cake balls before they had been dipped in the chocolate so that all I needed to do was assemble and decorate. I would definitely recommend freezing them in this stage of the recipe if at all possible, it's a lot harder to freeze and store after they're ready to go.
- In the past I've used a bowl of packed sugar to hold the cake pops as the chocolate sets. I use a cake pop stand now, but you could easily use a bowl of sugar or foam.. just something that will allow them to stand and dry upright.
- do one color of chocolate at a time. The chocolate will begin to harden and if you work with one color at a time it'll be easier.
- Narrow down the colors you'll need. While it's tempting to do a full barnyard of animals, picking specific ones will limit the amount of work you're doing. I made a pig, a cow and a chick for our party.
I would eat them within a week.
Yes. I recommend freezing before decorating with chocolate as it is a lot easier to store them that way.
I usually just roll the combined dough in my hands to form a circle. Placing them in a mini muffin tray can help them keep their shape.

Thanks for checking out my post! Be sure to see our other birthday and party posts.
- Our Barn Balloon Mosaic Photo Backdrop
- Rookie of the Year First Birthday
- Galentines Brunch!
- Baby in Bloom Baby Shower
📖 Recipe
Farm Animal Cake Pops
Equipment
- 1 mixing bowl
- 1 oven
- 1 spatula
- 18 cake pop sticks
Ingredients
- 1 box cake mix of choice I like to use the funfetti cake mix.
- ¾ cup frosting- or ¾ of your container Your icing acts as glue for the cake balls, so make sure to use enough.
- 2 packages white melting chocolate I like the Ghiradelli brand. You may not need the full two bags but it's nice to have it on hand in case you need extra of a color.
Instructions
- Bake your cake following the box mix instructions.
- Allow your cake to cool.
- Crumble your cake together in a bowl with ¾ of your jar of funfetti icing.
- Roll your cake mixture into balls. I place them in muffin tins to help them keep their shape. At this point you can either begin to dip them or freeze them for decorating later. Either way, you want to flash freeze or chill them for a few minutes before dipping into your chocolate.
- Melt your chocolate wafers in 20 second increments. If you're adding colors, add your food color after the chocolate is melted and separated into bowls for however many colors you're using. I like to use gel food coloring because a little goes a long ways, and it's easier to control how much is added to the chocolate.
- I recommend adding the melted chocolate into a small drinking glass. It is easier to dip a cake pop into a glass, and when you dip it you want to be able to submerge it.
- Dip your stick into the chocolate, it acts as a sort of glue between the cake ball and the stick. Add your cake dough on the stick and dip in chocolate, fully submerging it. Remove from the chocolate and let the excess chocolate drip off.
- Place into a bowl of packed sugar or your cake pop stand to harden.
- To decorate your cake pops, use royal icing, an edible food pen or melted chocolate to add eyes, spots or any other accents.
- Store in an air tight container or the refrigerator until ready to serve.
Notes
- I usually bake the cake a day before I make the cake pops. This way it breaks up the time investment and the cake has ample time to cool. In the past I've also halved this recipe when I didn't have as large of a party.
- You can freeze cake pops in a separate step as well. It's a lot easier to freeze them before they're decorated, so I'd recommend adding to a airtight container before melting any chocolate and freezing until a day or two before your event. Allow them to thaw before finishing the decorating.



Claire says
These are the perfect sized treat!
Melanie says
Umm these are adorable and definitely making these!