
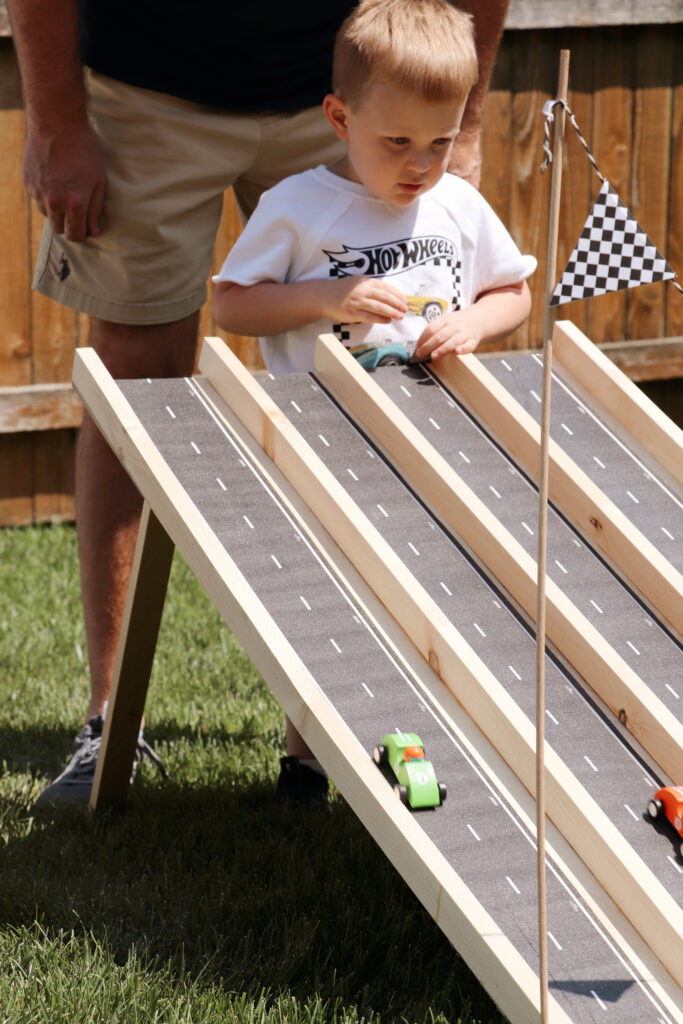
When my son said he wanted a race car themed birthday party I was not surprised. There are hot wheels car in pretty much every room of our home. I wanted to make it extra special though so I decided to try my hand at building him a racing ramp for the party. This ramp is perfect for birthday parties or just to have for playing on the driveway or even inside.
I want to give a disclaimer that this is a very entry-level wood project. It can be made in a weekend and does not require any extensive tools as long as you have the team at your preferred hardware store make your cuts. This is not a super sturdy project, but it made it through our party with 12+ kiddos so if you're just wanting it for an event that may be perfect. It costs about $25 to make, and around the same to decorate. You can embellish as much or as little as you want!
Looking for more birthday inspiration?
- Our Going 'Two' the Farm Themed Birthday Party
- Easy Fringe Backdrop
- Rookie of the Year First Birthday
- A Donut Themed Birthday Party
Supplies
- (1) piece of sanded plywood, 2x4ft (in size and ¼ inch thick)
- (3) 1x2 8ft strip (Have the team cut these into 4ft strips
- dowel rods (optional, for finish line) and finish line garland
- Race tape
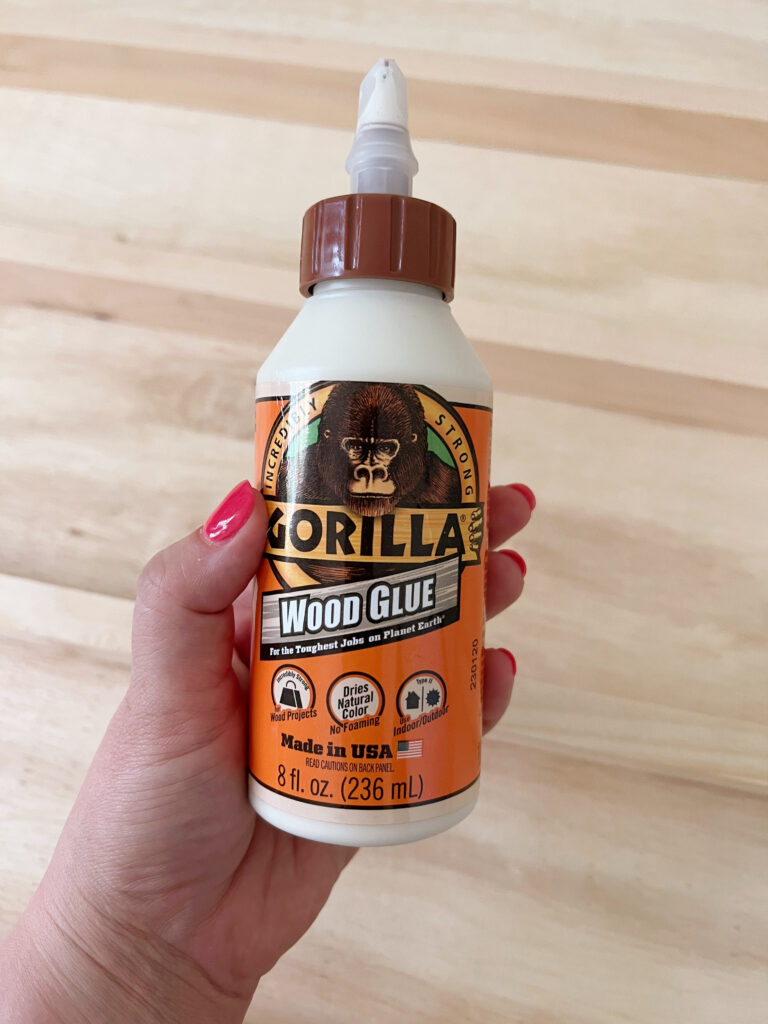
- wood glue
- wood clamps
- drill and screws (or screwdriver)
Directions
- When you purchase your wood have the team there make the cuts. Typically these are free but sometimes they're between 30-50 cents. Cut the strips of wood into 4ft strips, and with (2) 2-ft strips. You'll use the 4-ft strips to make your 'lanes' and the 2ft as the feet of the ramp.
- Add a layer of wood glue to the first strip and clamp the piece of strip wood to the ramp. Repeat until all 5 pieces have been glued down.


- Standing the ramp up at an angle, decide where you want to have the legs. I used screws to secure them.
- Note- you may want to use a 'L' bracket or create an 'x' shape if you're wanting this to be a longer-term ramp. The way I did it allowed it to be played with but kiddos couldn't stand on it or be rough with it without risking the sturdiness.
- Screw the leg directly into the plywood. The sanded plywood is thin enough you could use a screwdriver, but you can use a drill too. You can prep it with a washer if needed or if the plywood starts to tear.

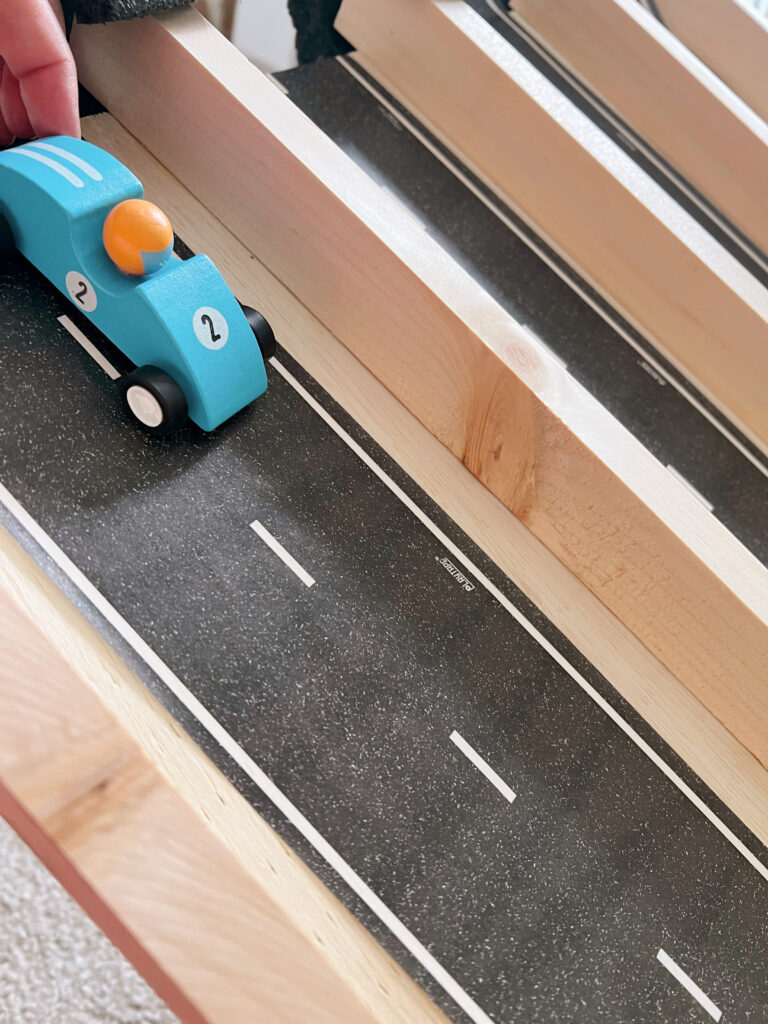
- The best part is adding the playtape down the ramp! It makes it look so fun! I used the 4inch size.

- The 'finish line' is made by stringing your garland across two dowel rods. I used this size. You can also make a starting line if you have the space/a long enough track.

Tips
- Any cars will work but we picked these vintage-inspired ones and they were so cute! Keep a few extra cars around so kiddos can race throughout the party.
- In addition to screwing the 'legs' into the ramp I used a bit of wood glue too to add security.
- We did have one leg break during setup, so we added a washer and rescrewed it into position. If you have kiddos older than toddlers you may want to give it extra support by adding another strip in an 'x' position.
- You can add an extra sheet of sanded plywood to make a longer track.
- I only have two wood clamps, so for extra support when holding the wood together I used a 20lb dumbbell. Anything heavy will work!


Jillian Manesh says
this looks so good! I can't wait to make something similar for my son's party. love that he will be able to use it after the party too 🙂
CB says
Hi- where did you find the vintage inspired race cars? I’ve looked online and am having trouble finding them.
Claire says
Hi! I used these: https://www.bubblegummarket.com/products/pull-back-racers-set-of-25?variant=43773479649524 and we still play with them! Hope that helps!
Sam says
Hi where did you find the garland for the end?
Claire says
Hi! It was a part of this race car garland- I cut it and strung between dowel rods! https://rstyle.me/+0to8Gz8j9FGaHl-0aU1cgQ