One of the fun parts about Halloween is making spooky things cute and special for kiddos. These bat, ghost and pumpkin characters are fun Halloween cake pops that are sure to be a hit at any party. Cake pops can take a bit of time but are so easy to make, we made these farm-animal themed pops for my son's second birthday and these pastel cake pops are perfect for Easter brunch or during Spring. We've even made football cake pops!
To make these you can use a box cake mix and store bought frosting or you can make your own from scratch. I like to break up this recipe into two sessions. First I bake the cake and make the cake pop balls, and then the second day or before the event I do the decorating. This cuts down on the amount of dishes you have to do and how long you're working on them at a time.
More Halloween Treats
- Easy Halloween Popcorn Balls
- Caramel Apple Bar
- Pumpkin Hand Pies- An Easy Fall Pastry
- Pumpkin Spice Cinnamon Rolls with Heavy Whipping Cream

Ingredients
- Box cake mix in flavor of choice, I used Oreo Funfetti.
- Frosting in flavor of choice. I used a purple funfetti mix to lean into Halloween a bit.
- White chocolate chips or melting wafers. You can use food coloring with white chocolate chips or melting chocolate in a variety of colors depending on what you have on hand or access to.
- Cake pop sticks. If you can't find them, make these cake pop truffles instead! They're still delicious.
- Mini oreos, black royal icing, googley eyes and sprinkles for decorating.
Directions
- First, bake your cake following the box instructions. Swap milk for water for a more flavorful cake.
- For this recipe, I use half of a baked cake. I like to wrap up the other half and freeze it. This will make about 12-15 cake pops. If you need a larger batch use the whole cake.
- After cake has cooled, using a fork or your fingers scrap off the top portion of that cake that's turned golden brown. Then crumble the cake into a bowl.
- Here's where you can either use a hand mixer or a food processor to get the cake mix really fine before adding frosting.
- Add your frosting to the mixture and use your hand mixer to combine well. The frosting acts as the glue holding the cake batter together. If it's too crumbly add a spoonful at a time until you reach the desired consistency. It should hold together on it's own but not be overly sticky.


- Then roll your cake balls, I go for approximately a nickel size.
- Next, you're going to flash freeze them for around 20 minutes. I like putting them in a mini muffin tin because it contains them well and helps me double check the sizing.
- If you're making your cake balls ahead of time this is when you can put them in a ziploc baggie and pop it in the freezer. (I do this frequently so I can make them in sessions.)


- While your cake pops are in the freezer, prep your chocolate.
- After the chocolate is melted and you've removed the cake pops from the freezer, dip one stick in the melted chocolate, and then add the cake pop to it. This will help keep the cake pop on the stick.
- Dip your cake pop in the chocolate, (make sure it's thin enough that you can easily dip the cake) and spin around until covered.
- Remove from the chocolate and allow one side to drip off any excess chocolate.
- Place in your cake pop stand or a jar of packed sugar to allow the chocolate to harden.

Tips
- Use a food processor to get a really finely ground cake before adding your frosting.
- Freeze your cake balls, splitting this into sessions/days is really helpful when it comes time to do the dishes.
- When making your royal icing for decorating, start with this base recipe and add powdered sugar to thicken it. If you're using a storebought version you'll either want to add powdered sugar to thicken it or a little water at a time to thin it out. I always like to put my icing in a piping bag (or you can use a ziploc baggie and cut the corner) when I'm going to be decorating it.
- Use a sharp knife when cutting your oreo pieces. Using a dinner knife will lead to cracking.
- If you're having trouble getting them to be 'pops', ditch the stick and serve cake truffles! They'll still be adorable and your guests will love them.
- Make sure your cake balls are still chilled when you dip them in chocolate. If they're too warm they'll lose their shape.
Pumpkin Cake Pop
- Use orange food coloring or orange melting wafers to make your cake pop orange.
- Using black royal icing or a food pen, add your pumpkin face.
- For a variation you could make a spooky face or use googley eyes instead of icing.

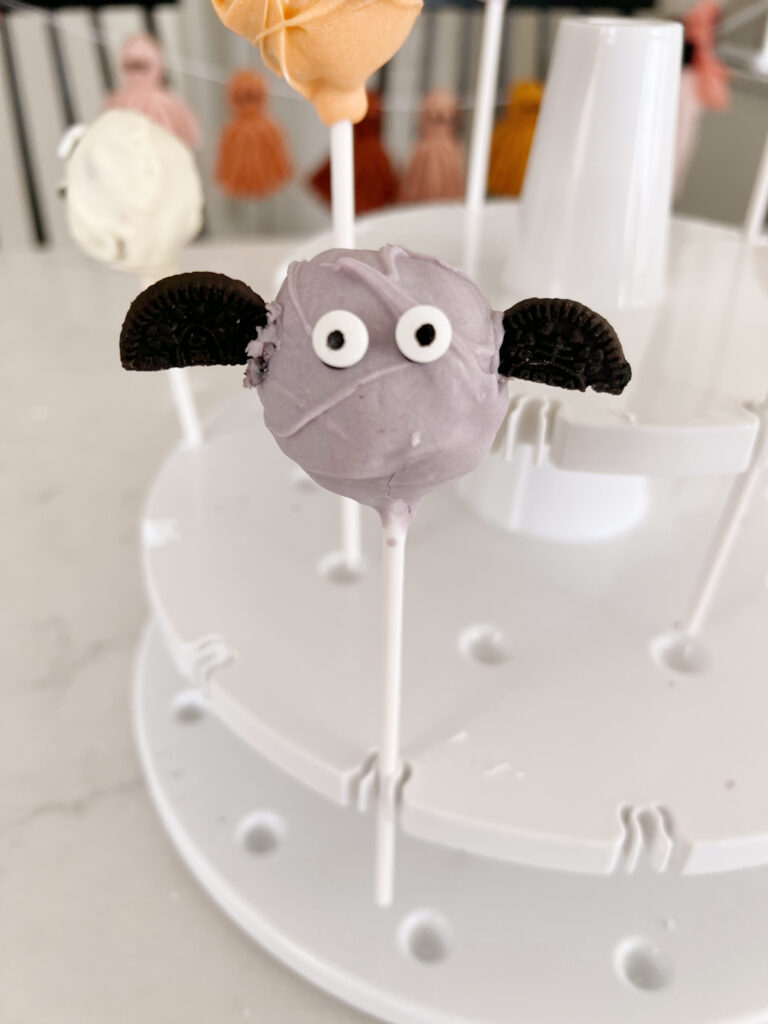
Bat Cake Pop
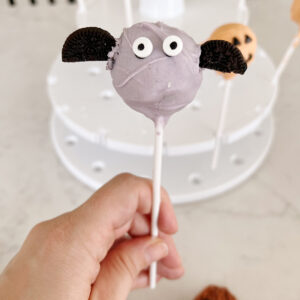
- Use purple icing for a fun and spooky color.
- Add googley eyes, securing with royal icing or additional melted chocolate.
- To make oreo wings, cut a mini oreo in half. Adhere to the bat by using a knife and gently making a dent in the chocolate shell. Add a bit of chocolate to the edge of the oreo and slide it into place. Hold for a few seconds to secure. You could also add it immediately after dipping the cake pop in chocolate.

Ghost Cake Pop
This little guy is all about the googly eyes! You can add a facial expression using royal icing if desired, but the best thing about the ghost cake pop is how simple it is.
Other Halloween Cake Pop Ideas
- Make a mummy instead of a ghost by using white icing or additional white chocolate and spinning it around the cake pop.
- Use green food coloring or chocolate wafers to make a monster cake pop.
- Make a witch by adding a cone hat.
- Add festive sprinkles and icing in fun Halloween-themed colors.

FAQ
I like to use white chocolate chips because of convenience, but you can also use colored chocolate wafers that are available at craft stores.
This is completely up to your personal preference! For these Halloween cake pops I used an Oreo Funfetti cake with purple Funfetti icing.
Yes. I recommend freezing them before adding the chocolate shell and decorations. They'll last for at least 3-4 weeks in the freezer. If you decorate them completely you'll want to wrap very carefully and allow them to thaw completely before removing and displaying them.
📖 Recipe
Halloween Cake Pops
Equipment
- 1 stand or hand mixer
- 1 glass bowl, microwave safe
- 1 food processor optional
- 1 piping bag for detail and design work
- 1 knife for cutting oreos
- 15 cake pop sticks
Ingredients
- 1 box cake mix in flavor of choice, I used oreo funfetti
- 1 cup milk swap the milk for the water in the cake mix instructions
- ⅓ cup frosting I used purple funfetti
- ½ cup sunflower oil can also use vegetable oil
- 4 egg whites
- 1 bag white chocolate chips or melting wafers
- 1 tablespoon royal icing
- googley eyes, sprinkles, mini oreos as desired, for decorating cake pops
- food color if using white chocolate for melting
Instructions
- First, bake your cake following the box instructions. I do recommend swapping milk for the 1 cup of water, this adds flavor to the cake.
- For this recipe, I use half of a baked cake. I like to wrap up the other half and freeze it. This will make about 12-15 cake pops. If you need a larger batch use the whole cake.
- After cake has cooled, using a fork or your fingers scrap off the top portion of that cake that's turned golden brown. Then crumble the cake into a bowl.
- Add your frosting to the mixture and use your hand mixer to combine well. The frosting acts as the glue holding the cake batter together. If it's too crumbly add a spoonful at a time until you reach the desired consistency. It should hold together on it's own but not be overly sticky.
- Then roll your cake balls, I go for approximately a nickel size. Next, you're going to flash freeze them for around 20 minutes. I like putting them in a mini muffin tin because it contains them well and helps me double check the sizing.
- While your cake pops are in the freezer, prep your chocolate. After the chocolate is melted and you've removed the cake pops from the freezer, dip one stick in the melted chocolate, and then add the cake pop to it. This will help keep the cake pop on the stick.
- Dip your cake pop in the chocolate, (make sure it's thin enough that you can easily dip the cake) and spin around until covered. Remove from the chocolate and allow one side to drip off any excess chocolate. Place in your cake pop stand or a jar of packed sugar to allow the chocolate to harden.
- Decorate your cake pops to look like Halloween creatures, or cover with festive sprinkles.
Notes
- I like to bake the cake one day, then make the pops and decorate a second day to break it up a bit.
- Use a hand mixer or a food processor to get the cake mix really fine before adding frosting.
- If you're going to freeze the cake pops for a later date, freezing them before decorating is much easier. They'll last for 3-4 weeks in the freezer.
- If you don't have a cake pop stand you can use a glass with packed sugar.




Claire says
Such a fun treat! The bat is adorable!
Elsie larson says
Adorable!!!!