
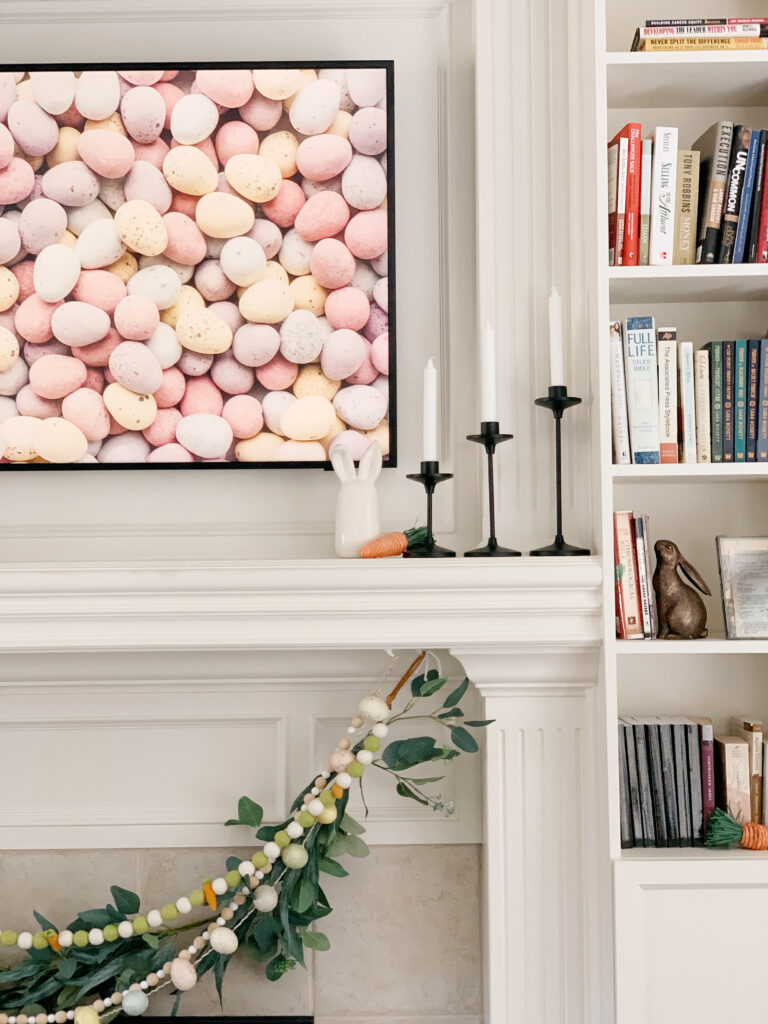
My mantle is one of my favorite places to decorate in my whole house. I've been seeing the most adorable carrot garlands on Etsy and even out while shopping, but I decided I wanted to make my own to add to my collection this year. The easier the craft is, the happier I am, so this one fit the bill! I love having something custom that I made too and can pull out every year to decorate my home in different spots.
I've made tons of yarn pom pom garlands in the past, but I've only ever purchased felt pom garlands, and that's the look I was wanting this time. You can get felt pom poms online or in some crafts stores. You can also use felt to make a garland into whatever shape you're wanting like Melanie did with this heart garland!
Supplies
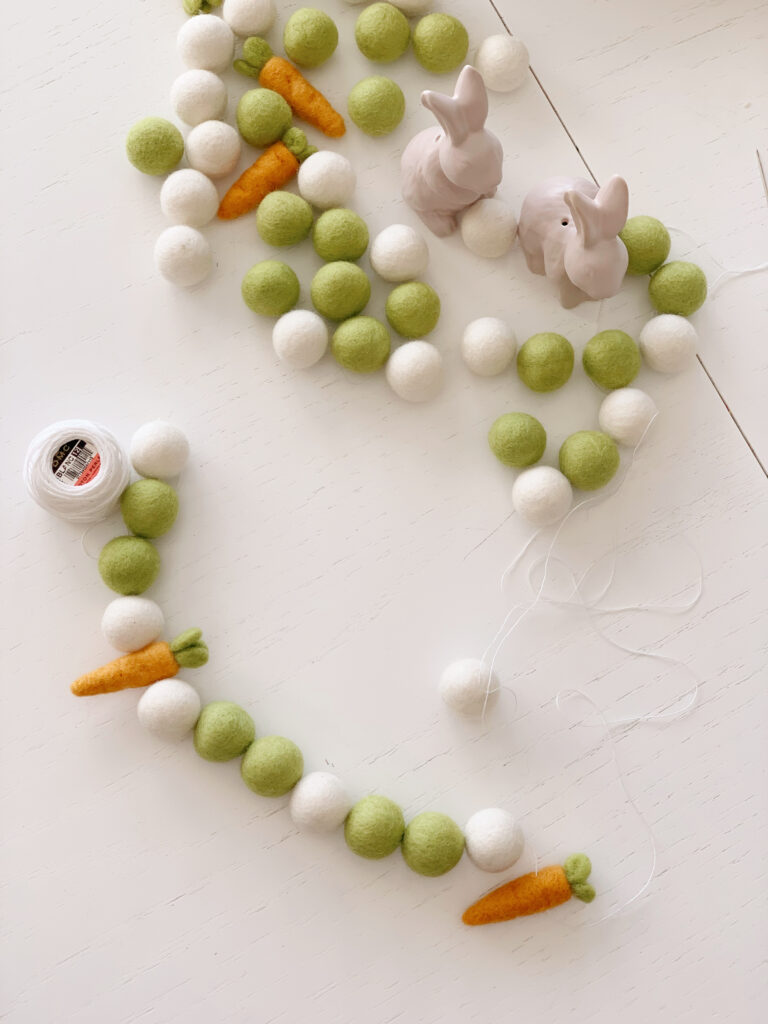
- Felt pom poms- I used 25 white circle poms, 25 yellow green circle poms and 5 carrot-shaped pom poms. They come in a variety of sizes, the ones I used in this garland are 1 inch/2.5cm.
- embroidery thread and needle
- small clipping of yarn
- command strips for under your mantle to hook the garland, unless you already have a different solution.
Steps
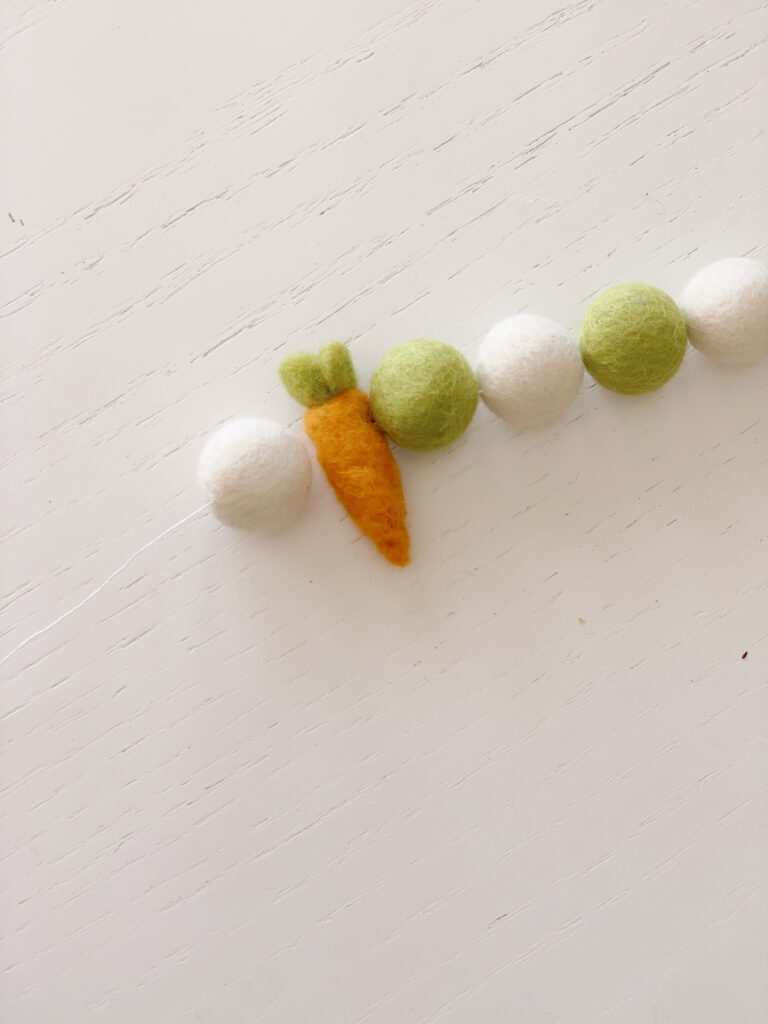
- Line out your poms in the pattern you want to follow. I made a few different ones but settled on alternating green and white and putting a carrot after every 10th pom.
- Thread your needle (I always double knot mine)
- Push the needle through the center of one pom and pull it through to the middle or end of the length of the thread.
- Continue until you've reached the desired measurement or used your full pattern of felt poms. My garland used 25 white 1 inch poms, 25 green 1 inch poms and 5 carrot poms and was right at 55in in length.
- I recommend leaving a decent length of thread empty so that you can adjust the length of your garland if needed.

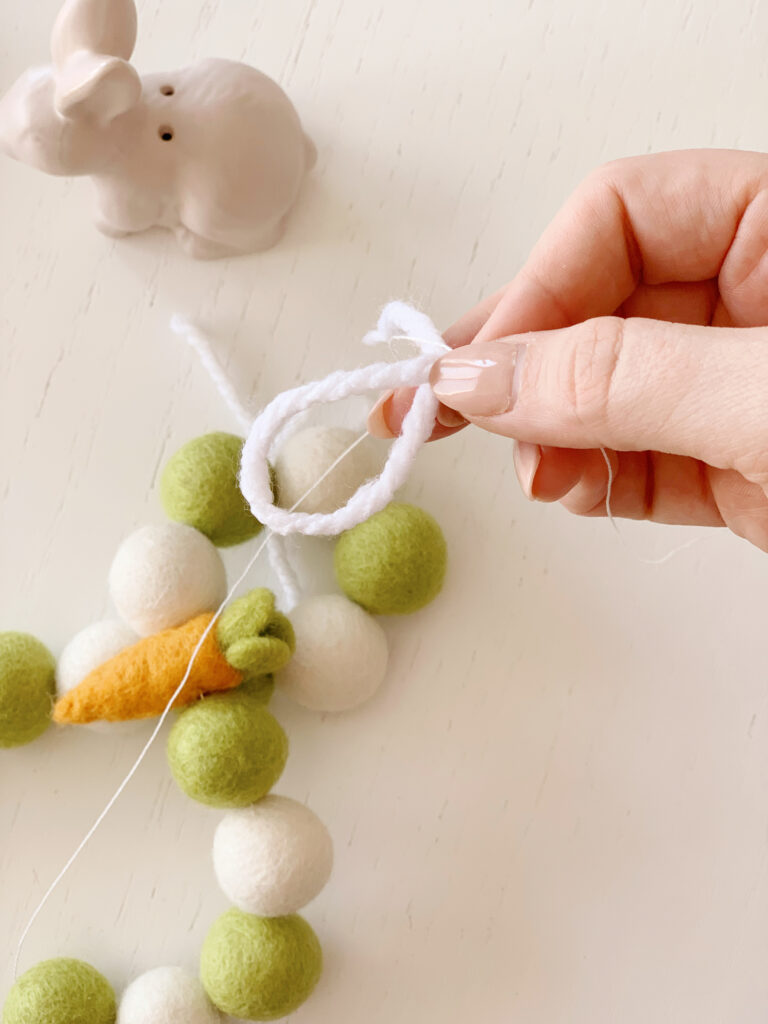
When you're going to hang your garland, tie a loop in a piece of yarn and then tie the edges of the thread the the looped yarn. This makes it easier to hang the garland with the yarn instead of the tiny thread. I have two command strips attached on either side under my fireplace mantle so that I can hang multiple garlands across it for every season! I think it's the easiest way to hang garlands.
Tips for Planning your Garland
- Consider what size you want - felt poms come in a variety of size, which will be part of determining how big your garland is and where you plan on hanging it. 2.5cm or 1 inch is pretty standard.
- Colors- picking colors for your garland is fun but can be challenging. I'm starting to build up a collection so that next time I can pull from a variety of colors and not spend as much. If you're ordering in bulk be sure to check what size you're getting and even measure a few you have to be sure. I ordered 100 off amazon that were teeny tiny. Which will be adorable in some future project but not what I was looking for at the time. 🙂
- a few pattern ideas- lay out your colors and sizes and think about what pattern you want to make. If you'r eshort on felt poms you can easily integrate a few yarn pom poms.
- Here's the Etsy shop I love, you can also find a variety of colors on amazon, at local craft stores, if you want to start a stash!

Looking for more easy home decor projects?
- DIY Boho Wreath
- DIY Spackle Art
- Our Kiddo Easter Book Display
- Paper Bag Easter Bunny Basket!
- The Cutest Easter Pajamas
Be sure to follow us on Pinterest and Instagram for more inspiration and behind the scenes looks!

Felt Pom Pom Garland
Equipment
- 1 needle
Materials
- 1 piece embroidery thread I typically cut it after I've made the garland the desired length.
- 25 single white wool felt pom poms you can customize this to the length of garland you're making and with the colors you're using. I used 1 inch/2.5cm.
- 25 single green wool felt pom poms you can customize this to the length of garland you're making and with the colors you're using. I used 1 inch/2.5cm.
- 5 single carrot or novelty wool felt pom poms I used carrots for Spring, but you can use any speciality poms for your event or ocassion. I used 1 inch/2.5cm.
Instructions
- Line out your poms in the pattern you want to follow. I made a few different ones but settled on alternating green and white and putting a carrot after every 10th pom.
- Thread your needle, I always double knot mine.
- Push the needle through the center of one pom and pull it through to the middle or end of the length of the thread. Continue until you've reached the desired measurement or used your full pattern of felt poms.
- My garland used 25 white 1 inch poms, 25 green 1 inch poms and 5 carrot poms and was right at 55in in length. I recommend leaving a decent length of thread empty so that you can adjust the length of your garland if needed.
- Tie off the end of the thread with a piece of yarn to create a loop. You'll use this loop of yarn to hook onto the command hook.
Notes
xoxo,
Claire


Leave a Reply