
Making a gingerbread house should be a nostalgic and fun experience- but half the time it ends up messy and exhausting. And the store bought kits just don't taste very good or the candy is too hard! I was planning to make one with my kiddo just for tradition's sake when I remembered a fun childhood activity. Making a graham cracker gingerbread house!! So I grabbed the graham crackers and have tips and tricks that you can use too.
Did you ever use a milk carton to make these in elementary school? That would totally still work! We did ours freestanding but I do understand why teachers and care takers opted to hot glue the crackers to a carton. Pair these with a mug hugger or enjoy with a hot cocoa stirrer or cocoa bomb and you have a full day of holiday baking festiveness that's actually easy.

Ingredients and Supplies
- You'll need 4 graham crackers per house. I actually think the generic version works better than the brand name in this case.
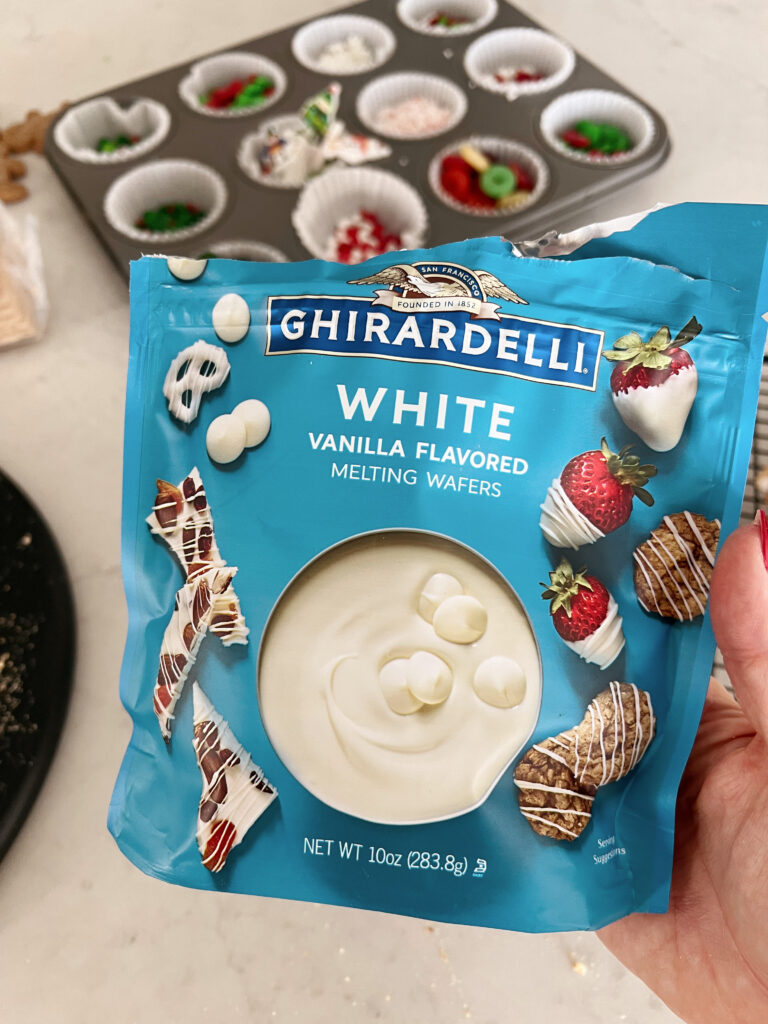
- Decorative icing, royal icing, (you could use my royal icing recipe but thicken it with additional powdered sugar) jarred frosting or melted white chocolate wafers or chips.
- a cooling tray or wax paper for them to rest on.
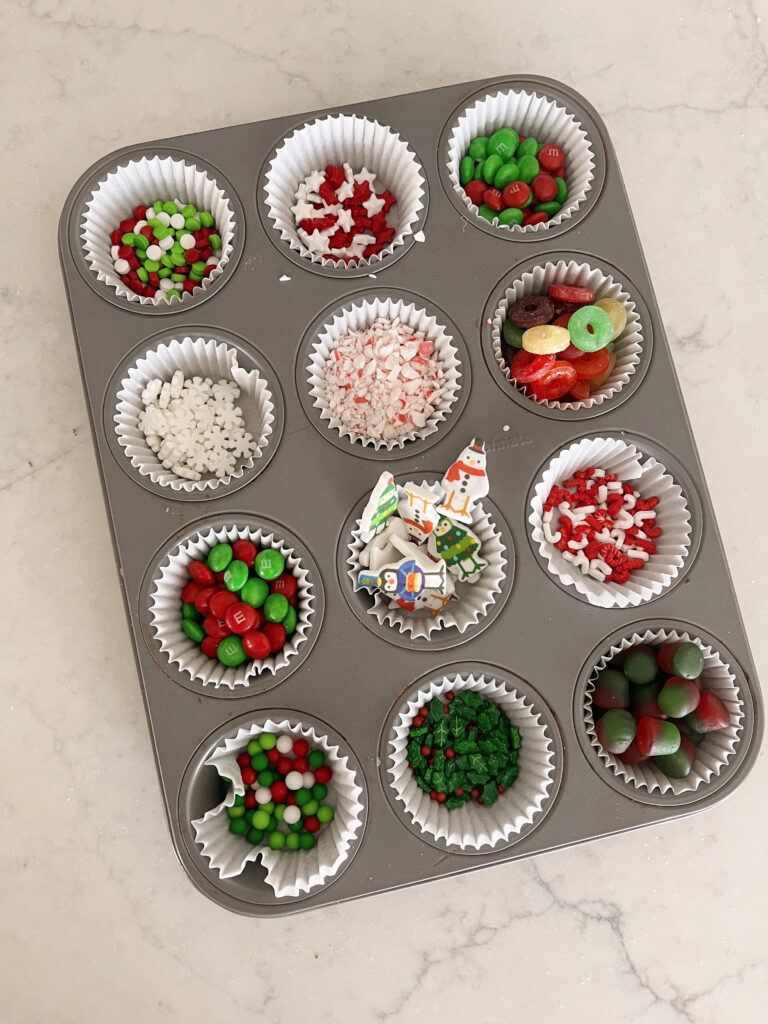
- A variety of sprinkles or candies (I used this kit and it was perfect!)
Topping Ideas
- A variety of sprinkles- in colors, shapes and sizes. I used a pack from Target in the holiday section that was on their premade gingerbread house display.
- Small candies like m&m's, lifesavers or dots. Gumdrops are always a good choice too!
- Crushed candy cane or sanding sugar
- decorative icing figures
- licorice would be cute to line a roof with.
How to Build a Graham Cracker Gingerbread House
There are a few steps and tips to making your own graham cracker gingerbread house. It's a super simple snack and craft but it is messy. There's a reason all our elementary school teachers prepped them and hot glued the crackers to milk cartons. 🙂
Cutting your graham crackers
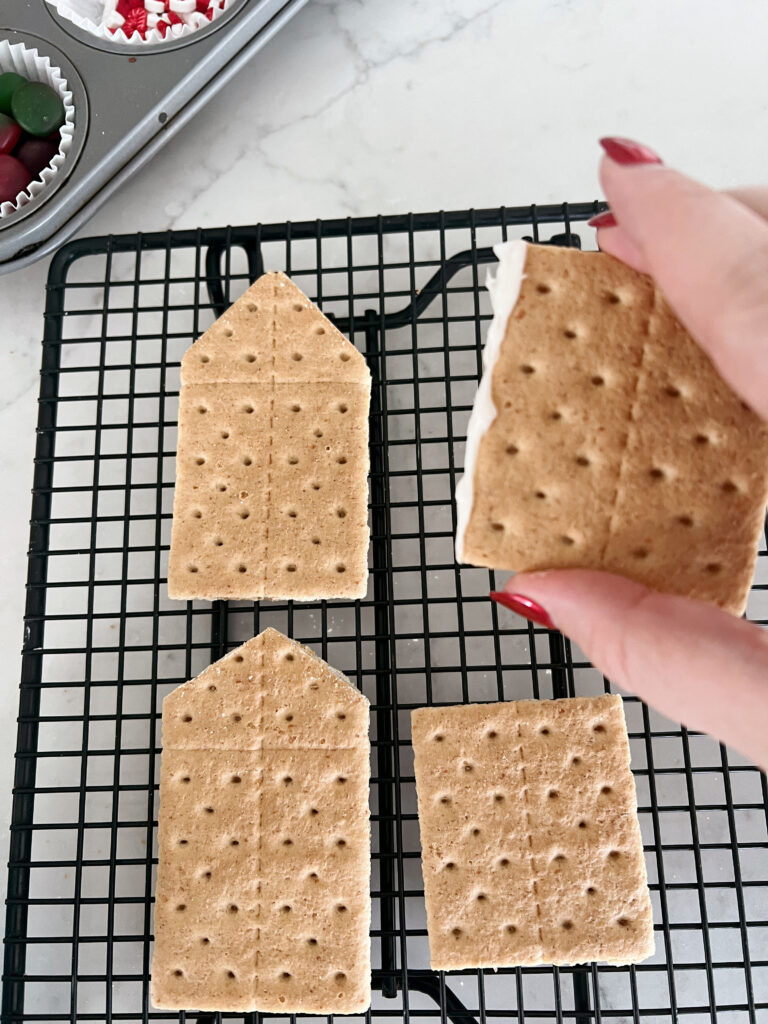
Take one of your long graham crackers and using a serrated knife cut the 'roofline' of your gingerbread house. Use a serrated knife and gently saw it back and forth to get the triangle angle. To have it be even on both sides, count the dots down the side of the graham cracker.

Picking Your Adhesive/Frosting
I tried 3 different types of what I refer to as caulk or adhesive when making our gingerbread houses. You can use jarred frosting, white chocolate chips or melting chocolates or decorating icing. All 3 held together well, and dried fairly quickly. If these are for display only or adults only you can use hot glue too. That will be the sturdiest option but with kiddos I'd rather use a frosting to hold it together!


Assembly
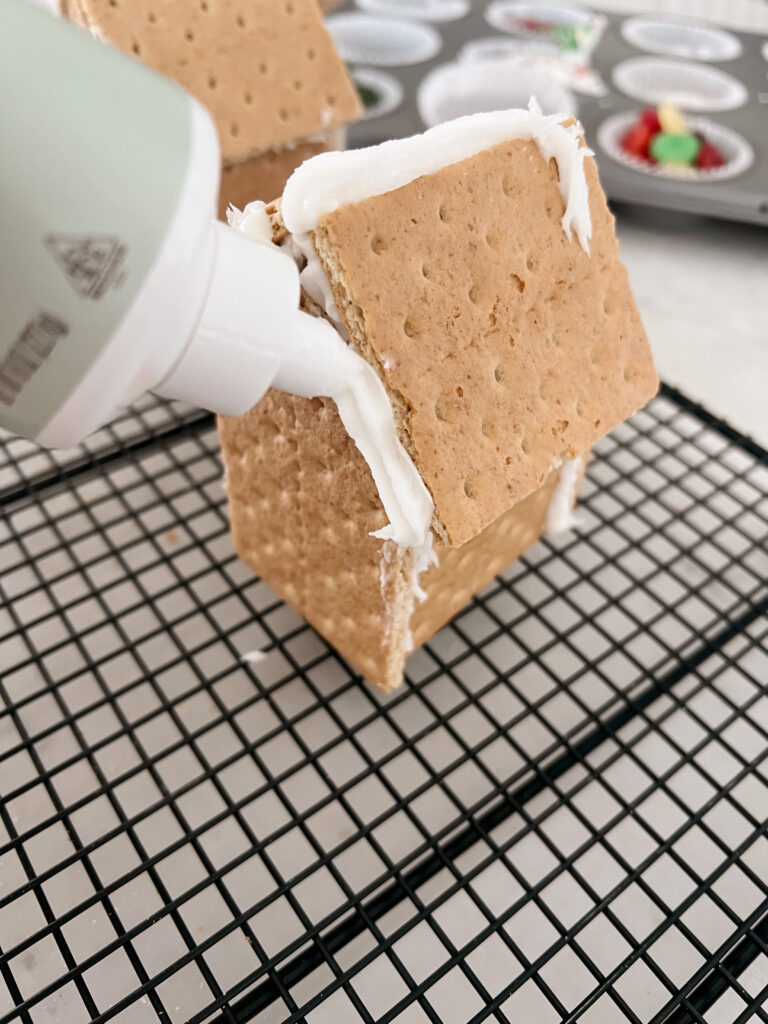
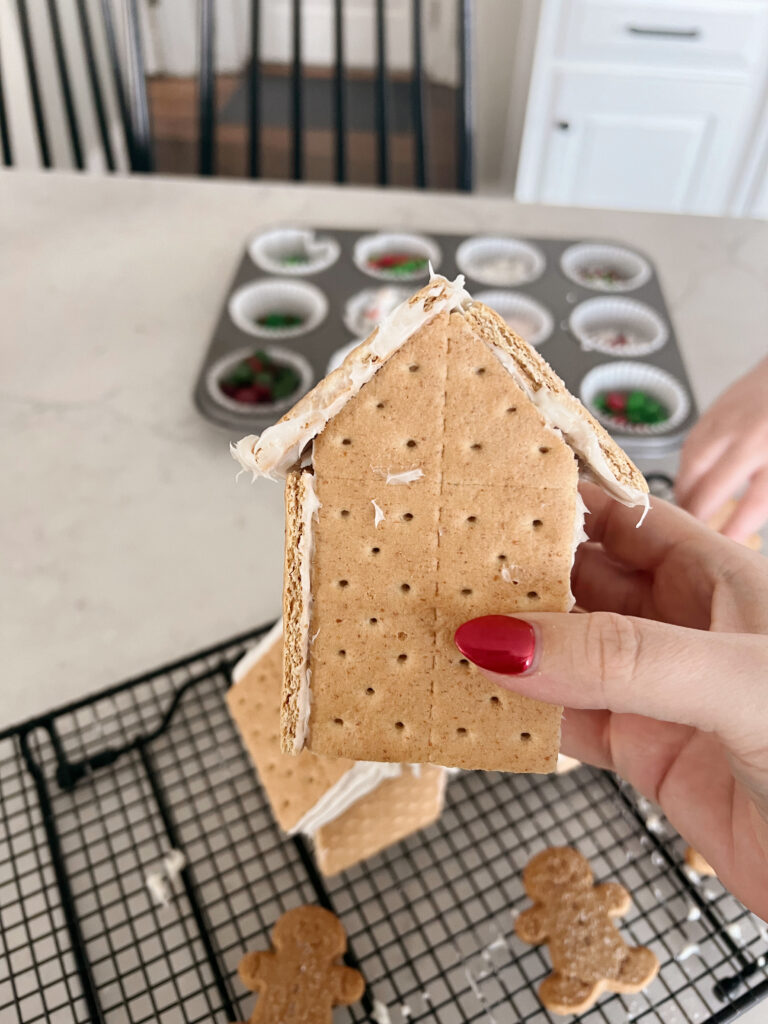
Start by taking your cut piece and outlining it with your icing of choice. I would do the sides of the cracker on the edge pieces and line the back of the 'triangle' or front/back of the house.
Then begin pressing together the pieces of graham cracker. You can either lay the back of the house flat while you do this or hold it together with your fingers and press together. This is the messy part. I had multiple houses fall apart but since it's just graham crackers it's really easy to put back together or start over.

Adding the roof was probably the trickiest part depending on how you cut the graham cracker. I added quite a bit of extra icing to the roofline to help keep it together. Once you add the roof go around the cracker edges and add additional frosting.
Allow your house to dry for 15-30 minutes, or really as long as your helpers can wait. I assembled during my son's nap so that he could decorate basically as soon as he woke up. It sat for about 45 minutes and everything held together well!
Tips for Decorating your Graham Cracker Gingerbread House
- Have everything prepped for little hands to be able to grab. I filled a muffin tin with liners and added all the sprinkles and candies so he could just grab and get creative.
- Have a variety of shapes and sizes
- Piping icing or decorating icing was the easiest for this part of making the houses. It held the candy well and didn't slide around/off too easily.
- If you have a toddler or younger child, assemble the houses in advance and let them have fun decorating with the candies. That way if they collapse or you need to make a few extra you have the time to do so.

FAQ
You can use decorative icing, a jar of frosting, royal icing or even melted white chocolate chips or melting wafers.
A variety of shapes and colors make this fun! You can use sprinkles, dots, gumdrops, m&m's' and/or licorice.
These gingerbread houses will stay stable for a few weeks, but the longer they sit out they'll start to grow stale. Store in airtight container or enjoy after everyone has a chance to ooo and aw over them.

📖 Recipe

Graham Cracker Gingerbread House
Equipment
- 1 serrated knife
Ingredients
- 4 graham crackers I actually think the generic version works better than the brand name in this case.
- 1 cup icing Decorative icing, royal icing, (you could use my royal icing recipe but thicken it with additional powdered sugar) jarred frosting or melted white chocolate wafers or chips.
- sprinkles, candies and decorative items of choice
Instructions
- Take one of your long graham crackers and using a serrated knife cut the 'roofline' of your gingerbread house. Use a serrated knife and gently saw it back and forth to get the triangle angle. To have it be even on both sides, count the dots down the side of the graham cracker.

- Start by taking your cut piece and outlining it with your icing of choice. I would do the sides of the cracker on the edge pieces and line the back of the 'triangle' or front/back of the house.

- Then begin pressing together the pieces of graham cracker. You can either lay the back of the house flat while you do this or hold it together with your fingers and press together. This is the messy part. I had multiple houses fall apart but since it's just graham crackers it's really easy to put back together or start over.

- Adding the roof was probably the trickiest part depending on how you cut the graham cracker. I added quite a bit of extra icing to the roofline to help keep it together. Once you add the roof go around the cracker edges and add additional frosting.

- Allow your house to dry for 15-30 minutes, or really as long as your helpers can wait. I assembled during my son's nap so that he could decorate basically as soon as he woke up. It sat for about 45 minutes and everything held together well!

- Decorate with sprinkles, candies or icing of your choice! Use a muffin tin to set out your candies so little hands can easily help. Allow to fully dry. If storing, keep in an airtight container for 2-3 weeks. Otherwise enjoy right away or after everyone has a chance to vote or oo and aw over them!


Claire says
Nostalgic and way tastier than store-bought!