
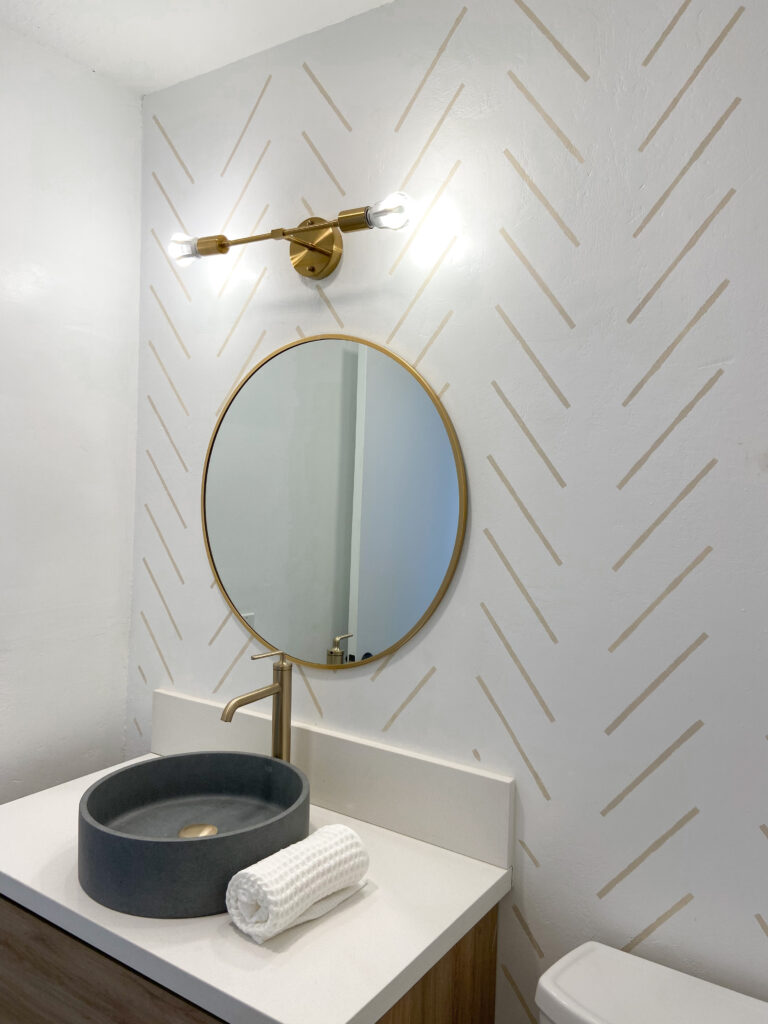
Today I am so excited to share our bathroom accent wall with you! Our little powder room was in need of some sprucing, and I wanted to have fun with an accent wall while staying true to our modern, minimal, beachy home decor style. I was originally looking for a fun patterned wallpaper, but once I saw the pricing on those I quickly switched gears and found a large herringbone stencil pattern that I loved. I am so happy with the results and even happier with the cost to make it! The price for all of the supplies was about $95. This was my first attempt at a wall stencil of any kind. Today's post is all about what I learned through this process and what I would do differently next time! Curious to how I styled this bathroom? Check out my modern boho bathroom post!

Supplies
I spent quite a bit of time researching what stencil to buy, and overall I'm really happy with the one I chose. I ordered this large stencil from Etsy, which came with an additional smaller stencil for doing edges and a few small freebie gift stencils. The very best purchase I made from this shop though was their stencil essential tools kit!
The leveling clip-on tool seriously changed my experience so I would highly suggest buying this! The kit also came with a foam roller and stenciling brush. I almost exclusively used the foam roller but the stenciling brush was useful for the awkward to reach places.

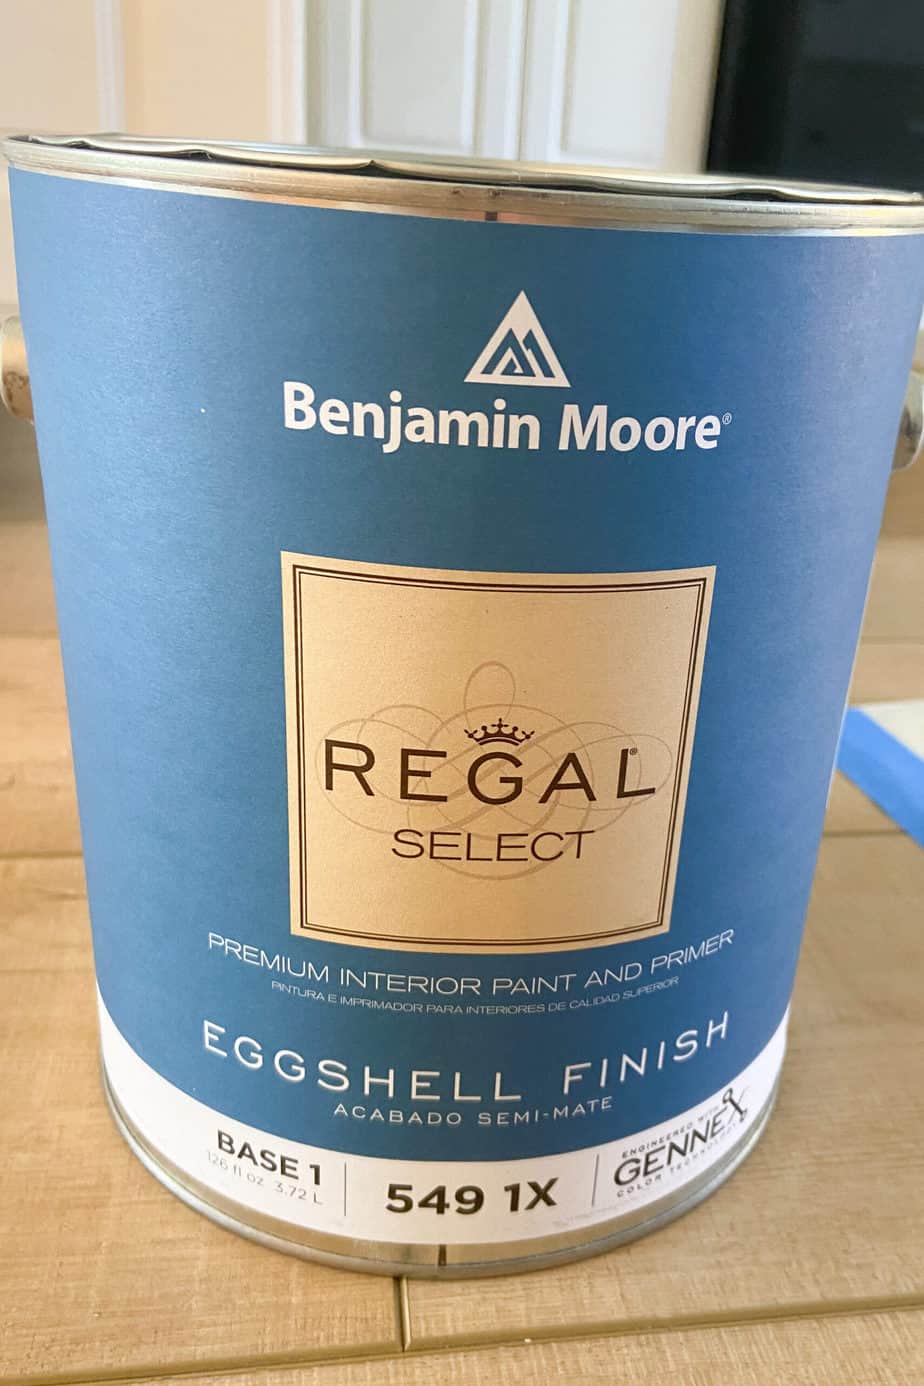
The last items needed for this project is a roll of painters tape and the paint. I used Benjamin Moore's Regal Select interior paint in Sandy Clay with the Eggshell finish. The shop I bought the herringbone stencil from included instructions on what paint they recommended too, which was helpful. I ended up with a slightly different Benjamin Moore line than suggested but it worked perfectly fine for me!
Herringbone Stencil Placement
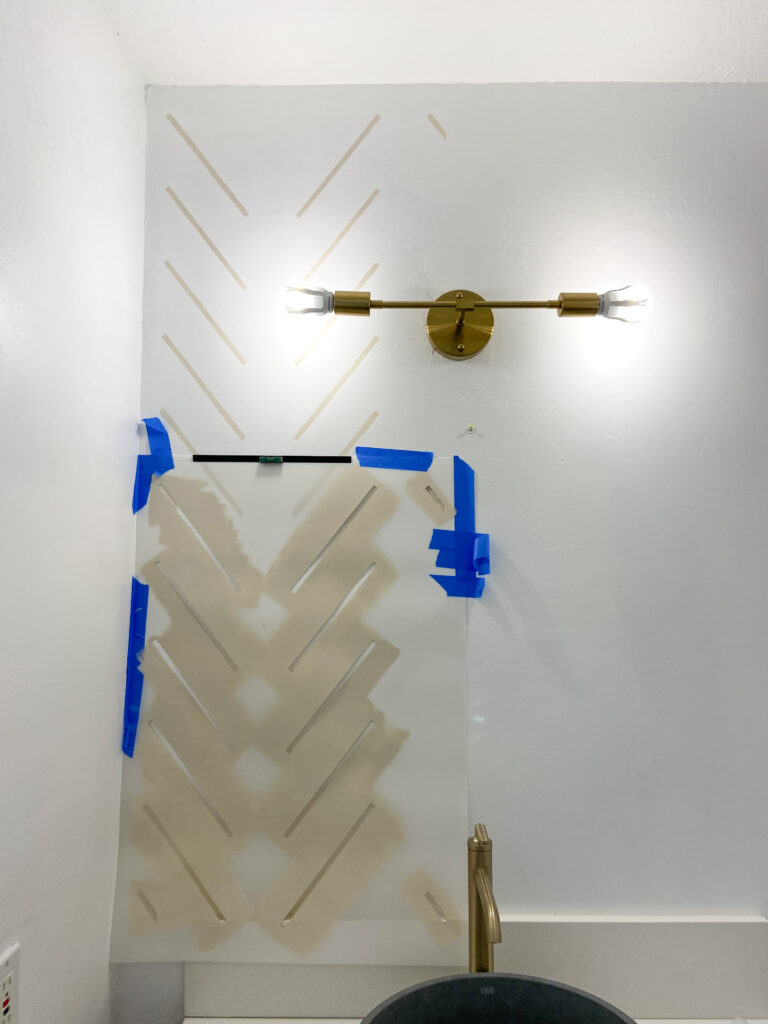
One thing I learned very quickly in this process is that stenciling on a wall that has fixtures (lights, vanity, toilet) already in place is HARD. I will definitely pick a blank wall for my next project! Another solution to this could be getting a smaller sized herringbone stencil so that there is more flexibility in placing it around permanent wall fixtures.
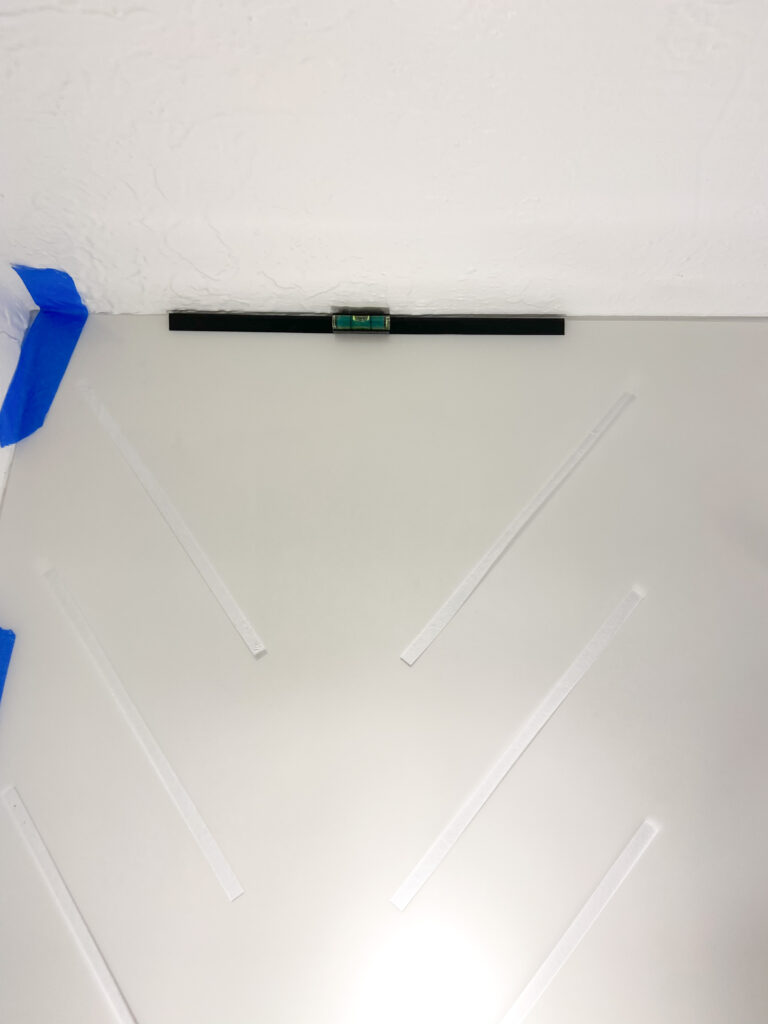
I started at the top left corner of the wall and worked down first and then across. Because the stencil was so large, the attached leveling tool made it really easy for hands-free leveling. Using painters tape to hold it in place was absolutely key too! I briefly thought about buying adhesive glue to stick the large herringbone stencil to the wall, but I didn't try that and was happy using painters tape for the whole project.
The first section created issues because of the light fixture placement but I taped the stencil so that the top corners laid flush on the wall, and then used my free hand to hold the stencil down around the light fixture while I painted. Tip: don't assume that the ceiling is level! Use the leveling tool to make sure the herringbone stencil is!

Painting
My biggest takeaway from this painting part? Use. Paint. Sparingly. lol. This was key in reducing bleeding underneath the herringbone stencil! I think it is normal to expect some bleeding (maybe the adhesive would help minimize this more than the painters tape?) but once I figured out my paint to roller ratio, it was easier to manage. Another helpful point to remember is that the bleeding isn't visible on each line when looking at the wall as a whole- so don't be discouraged if this happens to you! It's always possible to go back and do some touchups with the base wall paint too!
The second thing I quickly learned was minimizing the times I painted over each line. This helped with the bleeding issue and eliminated unnecessary mistakes if the stencil accidentally moved. I also placed my free hand right next to each line to stabilize the herringbone stencil and carefully painted over it. As you can probably guess, it was a little tedious! I also left time to let each section dry before starting the next.
A third useful painting tip I learned was making sure the back of the stencil was dry or wiped clean after each section. The nice thing about the large herringbone stencil is that it had pattern guides for the next section, so aligning the pattern down and across was really simple!
Note: the paint on the wall should be dry before starting the next section because the stencil pattern overlaps the previous section.

Useful Tips for the Large Herringbone Stencil
Overall this process was tough work mainly because of the permanent fixtures on the wall I chose. Otherwise it was actually rewarding to see it all come together! The large herringbone stencil worked well for covering space, but I can see the benefit in having it in a few different sizes. The downside is that this would mean purchasing additional sizes which adds to the cost of the project. The stencil is bendable, but trying to tape it in place on a corner or a curve was extremely challenging! If I can offer any advice, it is to avoid stenciling around anything else and stick to an easily accessible blank wall space.

I also used both sides of my large herringbone stencil and flipped it upside down, depending on the space that I needed to cover! As long as the pattern is being followed, make the stencil work for you! I do think that working around the light fixture and the vanity contributed to getting creative with the herringbone stencil. But hey, it worked for me!
The last tip I can give is take breaks when needed! If it gets frustrating, take a few minutes or hours (or days) and then get back to it!
If you enjoyed reading this post and are looking for more DIY projects, check out our boho wreath, how I created a ceruse finish on my coffee table and this spackle art posts! Looking for more bathroom remodel inspo? Claire's guest bathroom update is seriously cute!
That's all I have for now! If you have any questions or even other helpful tips about wall stenciling to share, please let me know in the comments!
xoxo,
Melanie


Leave a Reply