
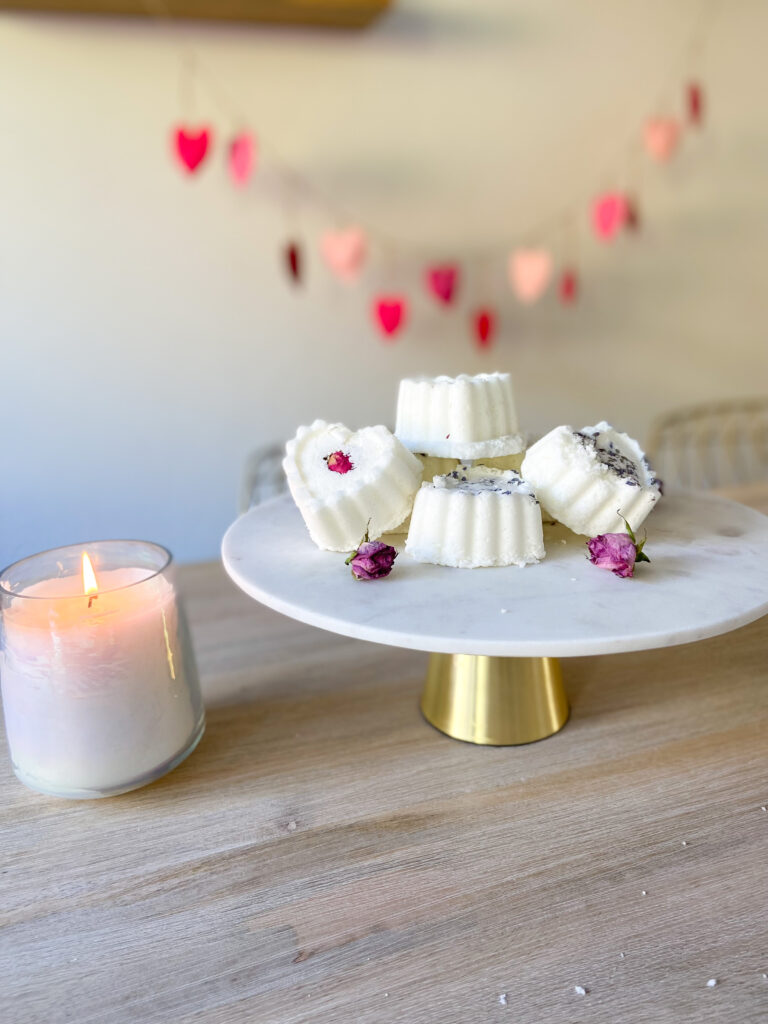
I love taking baths. They're so relaxing and there's nothing better than dropping a fun, fizzy heart bath bomb into the water! I didn't realize how simple these were to make, so today I'm sharing it with you! The heart bath bombs below are a perfect gift for Valentine's Day too. And I love that the ingredients are clean and simple, so I know exactly what's going into them.
If you're looking for an easy solution to your Valentine bath bomb needs, read on! They're easy to whip together and then you can go about your day while they dry. If you're in the mood to make more fun recipes for Valentine's day, check out our Valentine's Day Pancakes or our make your own Valentine's cookies kit posts!
Supplies for Heart Bath Bomb Recipe
- Citric Acid
- Epsom Salts
- Cornstarch
- Baking Soda
- Coconut Oil ( or Shea butter)
- Essential Oils
- Heart Shaped Silicone Mold
- Culinary Grade Dried Flowers
Steps
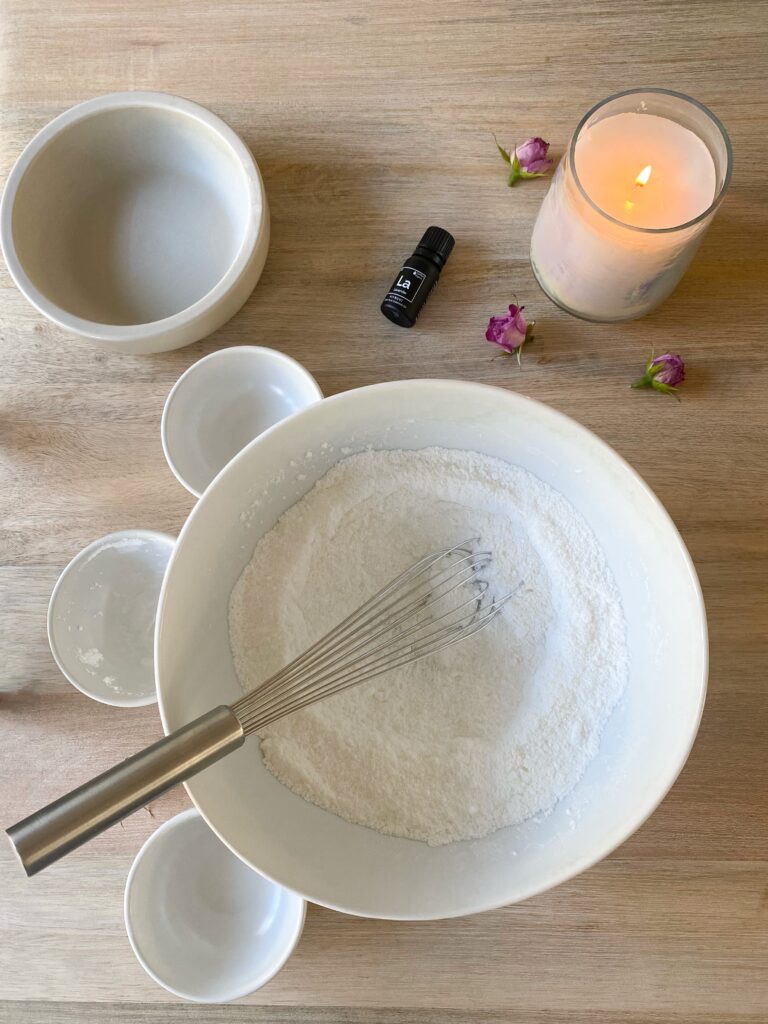
- Combine the citric acid, epsom salts, cornstarch, and baking soda in a bowl
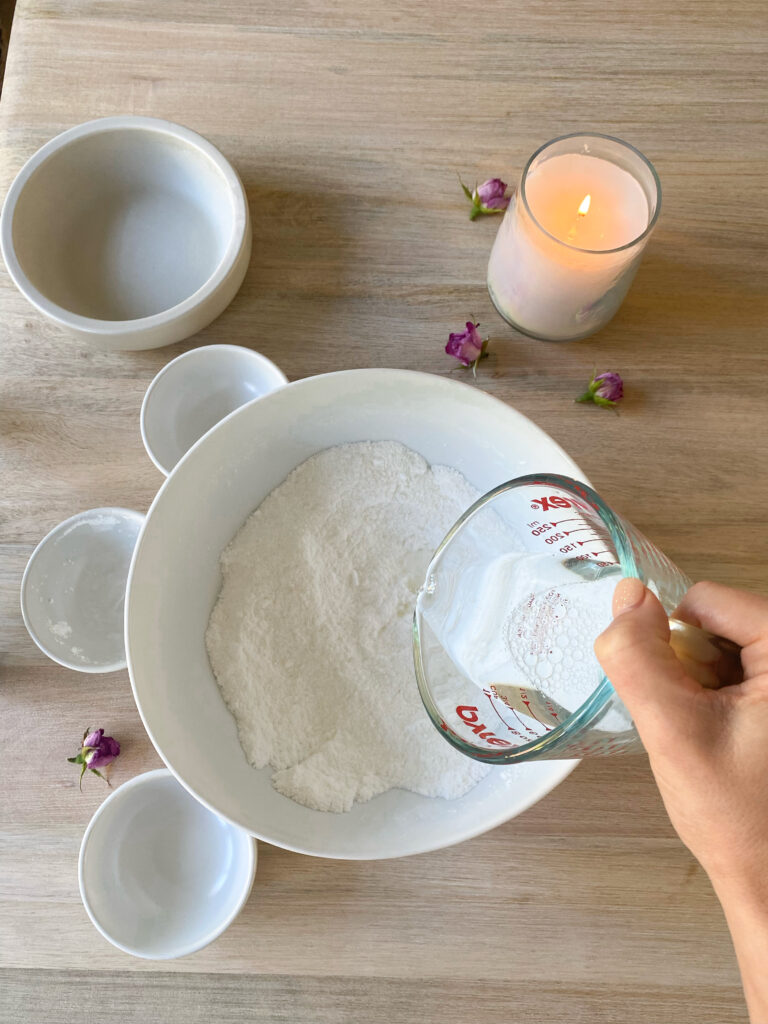
- Melt the coconut oil and then add water, essential oils of choice, and mix.
- Combine the dry and wet ingredients slowly. The key word is here is slowly, because the baking soda will fizz up really quickly! The mixture should hold together enough to be moldable.
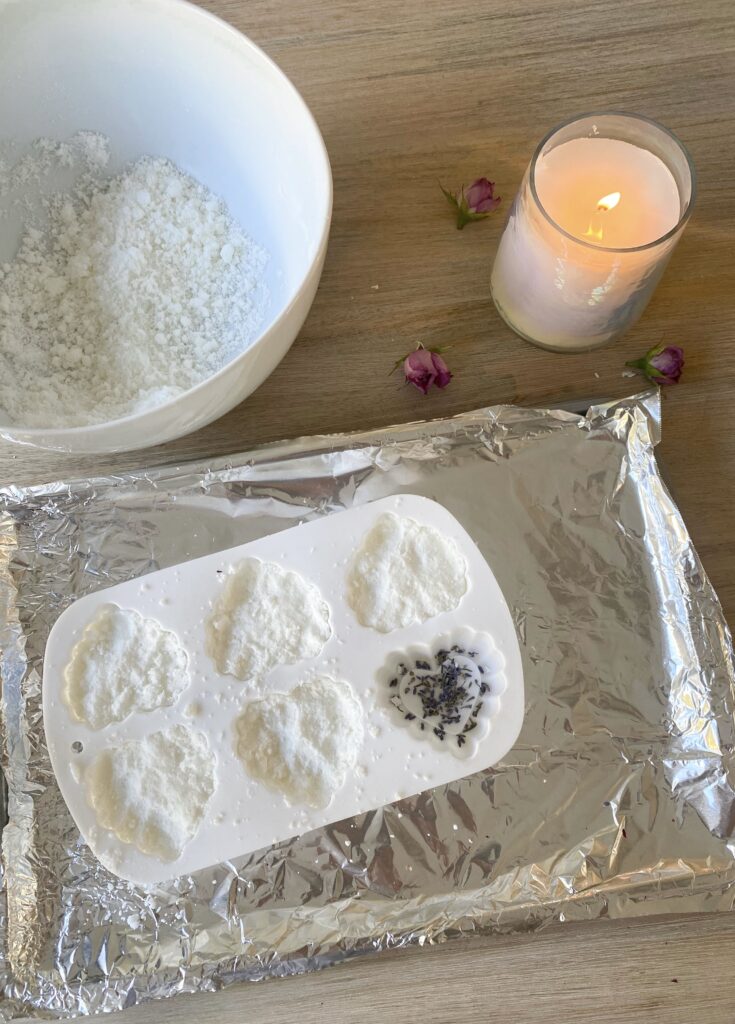
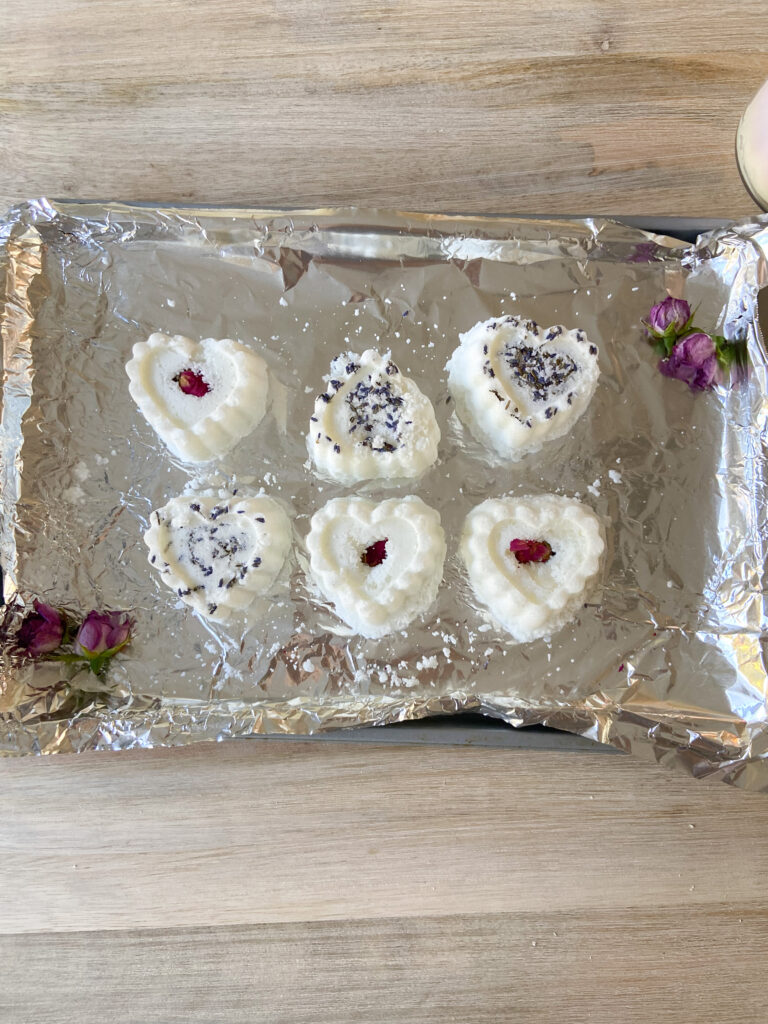
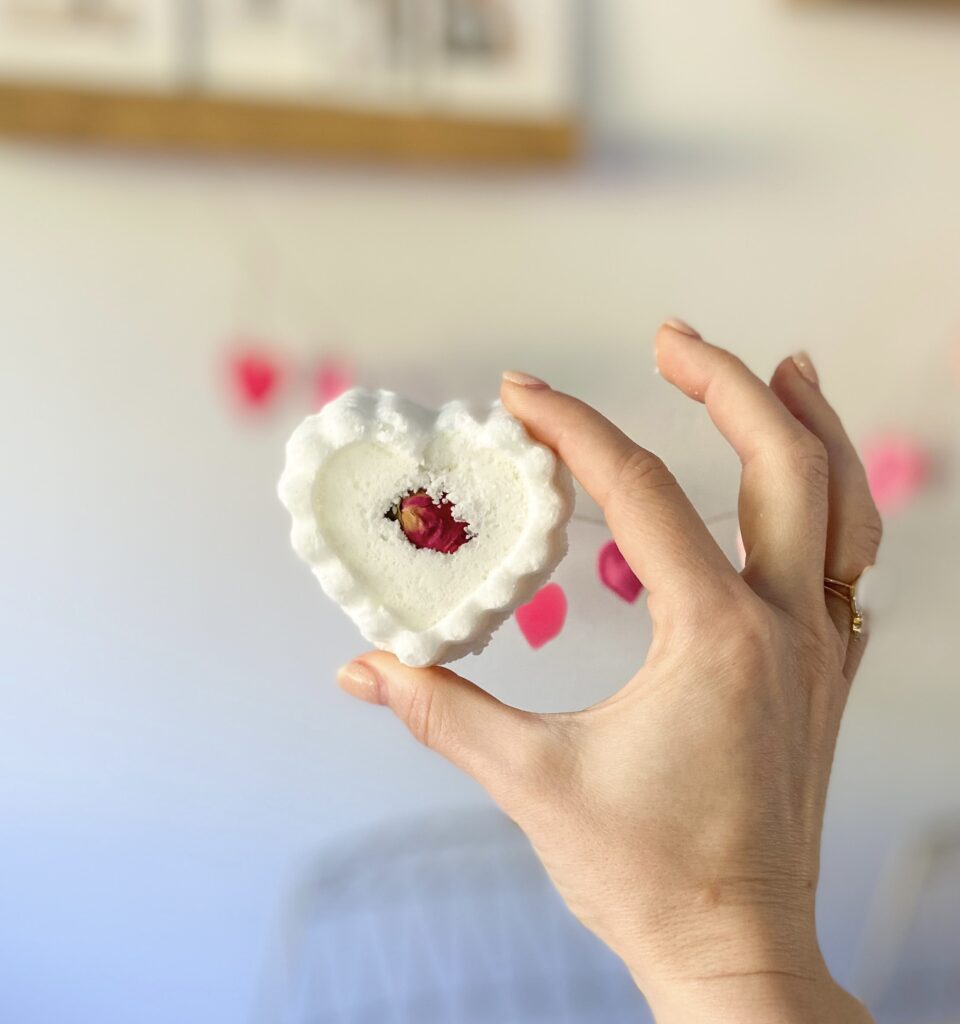
- Place dried flowers of choice in the base of the heart bath bomb mold. I used rosebuds and lavender!
- Press the mixture into the molds. I really packed it in to make sure it filled out the molds.
- Leave to dry out for 24 hours or until dry. I found that letting the mixture dry out completely before taking the bath bombs out was the best way. When it was still wet, they started to fall apart if I tried.
- Flip the mold upside and gently push out all of the heart bath bombs!
I referenced the homemade bath bombs from A Beautiful Mess, which is a great resource if you're wanting to do more research on these. The recipe below makes a larger batch and has a lot of coconut oil (Claire loves to add Shea Butter too) because we love a silky, ultra hydrating bath!
Tips for the heart bath bomb recipe success!
- The silicone mold I used here is technically a soap mold but I loved the details on it. You can make this recipe with any traditional bath bomb mold too!
- After packing the mixture into the mold I noticed that it was rising as it dried out. So every few hours I would pack it back into the mold, trying to get all of those pretty details in the finished product. As you can probably see in some of the photos, it wasn't a perfect final result, but I'm going to keep perfecting it! Plus they still work perfectly in the bath!
Side note: I've used these a few times and they are a dream! They would be a great gift to pair with a homemade Valentine! I hope these Valentine bath bombs add that luxurious touch to your Valentine's Day!
Enjoy!
xoxo
Melanie

Heart Bath Bomb
Equipment
- 1 Large bowl
- 1 Glass liquid measuring cup
- 1 Whisk
- 1 Heart shaped 6 Cavity Silicone Mold
Materials
- 4 Oz Epsom Salts unscented, unless making all the same scent
- 4 Oz Citric Acid
- 4 Oz Cornstarch
- 8 Oz Baking Soda
- 1 ¾ teaspoon Coconut Oil If only using Coconut Oil (without Shea Butter), then double
- 1 ¾ teaspoon Shea Butter
- 3 Tsp Water
- 1 Oz Dried florals of choice
- 7 drops Essential Oils of choice
Instructions
- Whisk the Citric Acid, Epsom Salts, Cornstarch, and Baking Soda together in large bowl
- Melt the coconut oil to liquid, and then add the water, shea butter and essential oils to the melted coconut oil. Mix.
- Whisk the liquid ingredients into the dry ingredients very slowly to avoid making the baking soda fizz. Once combined, the mixture should stick together and be moldable.
- Add dried florals into the base of the heart shaped silicone mold. I used rosebuds and lavender!
- Distribute the mixture evenly into the heart cavities and press firmly.
- Let the mixture dry for 12-14 hours, or until completely dry. I checked mine after 24 hours because I forgot about them! haha. But they were completely dried at that point.
- Flip the mold over and carefully release the heart bath bombs from the mold!
Notes
- If you notice the mixture rising over the mold as it dries, press it down into the mold every few hours. This helps pack it down and create the mold details.
- This silicone mold I used is technically a soap mold but I loved it because of the details. Any bath bomb mold will also work with this recipe!


Carol says
These are so pretty. I can’t wait to try them!!
Melanie Jameson says
Thank you!! Let me know what you think when you do!!
Rachel says
Obsessed!!! Can't wait to make 🙂
Brittany says
These are so cute and easy to make! A great idea for galentines 😍
Cammie Miller says
LOVE! 😍