Sugar cookies with royal icing are a great way to make any event, party or holiday special. These ghost sugar cookies are soft and sweet and easy. It's also a great design to get started with royal icing because you're only using two colors and can make as simple as you want.
I love making sugar cookies for parties, and as temps cool down it can be a fun tradition to start or try. Serve with a Halloween Hot Chocolate Bomb and you your treats covered for the night!
More Halloween Treats

Ingredients
- sugar
- unsalted butter
- vanilla extract
- 2 eggs
- unbleached flour
- baking powder
- salt

Making Your Sugar Cookie Tips
When baking the base of your cookies, my sugar cookie recipe is tried and true, (I used to sell them) and that recipe card is included at the bottom of this post. But you can use a box mix or other recipe too if you have a favorite. There are a few tips to make it as easy as possible.
- Use parchment paper! You can also use the reuseable silicone baking sheets, but I find rolling out on parchment paper is the easiest.
- After you've rolled out the dough and before you cut them, chill the dough. Aim for a minimum of 30 minutes but up to an hour or two if preferrable.
- After you've cut out your cookie shapes, flash freeze them before they go into the oven. This will help prevent spread. I usually bake my cookies for 10-11 minutes and have one tray in the oven and the other in the freezer.
- Keep it simple and don't try to have too many shapes. If I'm doing 2 dozen cookies I usually limit it to 3 or 4 shapes.
Tips for Working with Royal Icing
- Some people prefer using a separate consistency of icing for their outline and for the filling. I use a one-consistency recipe, you can play with recipes to find what you like!
- Use a spatula and drag it through your icing. Count to 10 and if it's filled back in it should be ready to use. If it comes back together too quickly it can get messy, and if it's too stiff it can be hard to pipe.
- To fill a piping bag, put it in a drinking glass and pour the icing into it. Then cut a small tip off the bag.
- Use a toothpick to pop air bubbles in your icing or to help smooth out any rough spots after piping it onto your cookie.
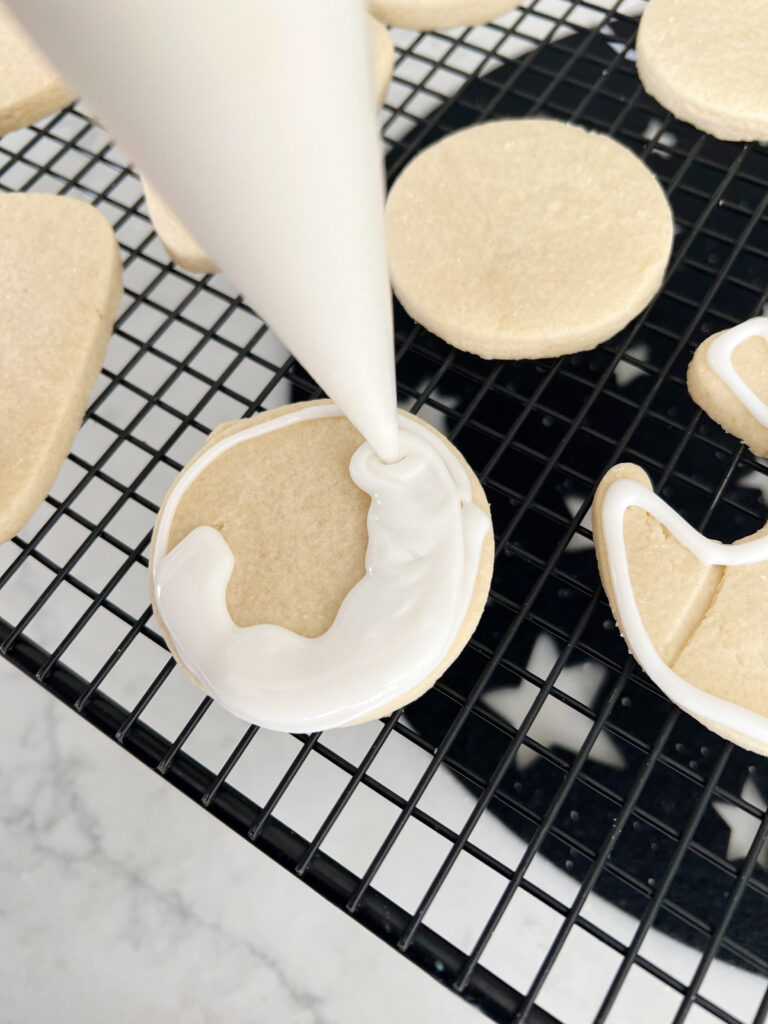
Ghost Sugar Cookie Decorating Steps
The recipe and more details and steps for the sugar cookies are in the below recipe card, but the fun part is really the decorating! I have a full guide on making royal icing, that recipe is included below too.
Spooky Ghost Sugar Cookie
This cookie cutter is such a basic but fun ghost shape! It comes in a set of Halloween cookie cutters, but I think I've seen it on it's own too closer to Halloween. It probably reminds me the most of Casper. To make this ghost (or any, really) into a 'spooky' ghost, use black royal icing and when it's time to add the face details (about 20 minutes after you have flooded or filled the cookie) make two eyes and a larger oval dot for the mouth, as if the ghosty is screaming.
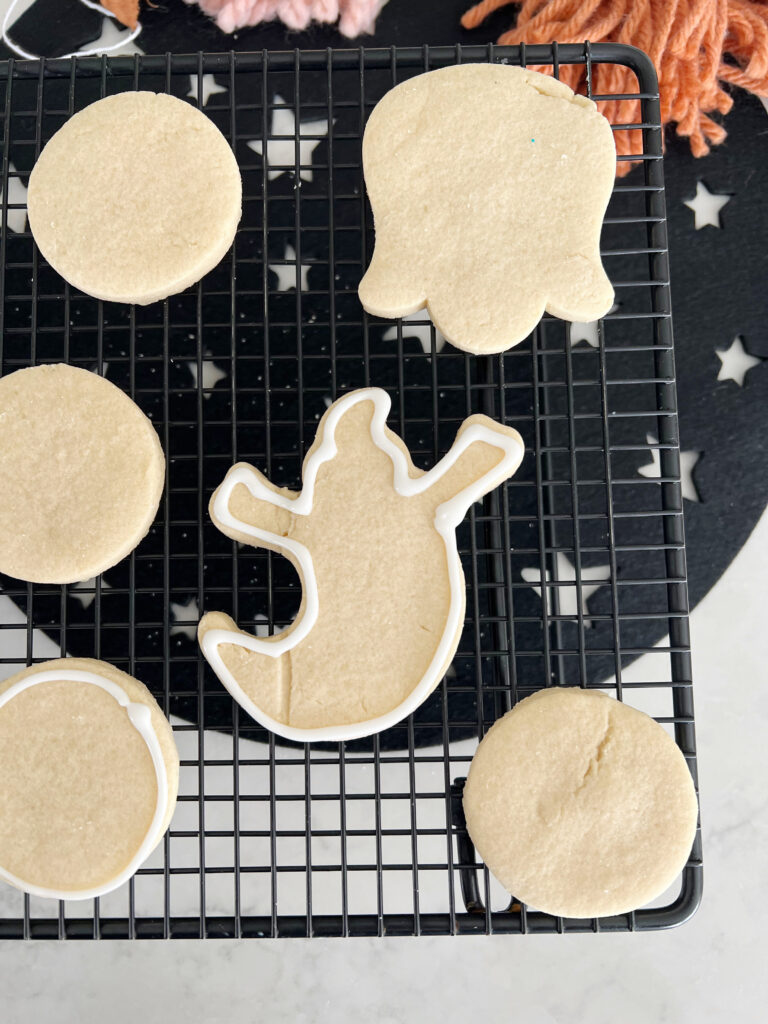


- Outline your sugar cookie with white icing.
- Flood or fill your cookie with your royal icing.
- Allow to sit for 20-30 minutes and add a face using black royal icing. If using an edible marker, allow the cookie to sit overnight or completely harden before attempting to draw on the face.
Ghost Sugar Cookie Made with a Circle Cutter
Having a set of basic shapes for cookie cutters is great because you can make any character or design with a few basic shapes. To make a ghost cookie, all you really need is a circle cookie cutter, and white and black royal icing.

- First, outline and flood or fill you cookie with white royal icing.
- Once the icing has set, decorate it to turn it into a happy, spooky or silly ghost. You can use sprinkles, googley eyes, or an edible pen to make your ghost faces. If using a pen I'd recommend letting your first coat of icing to dry overnight.
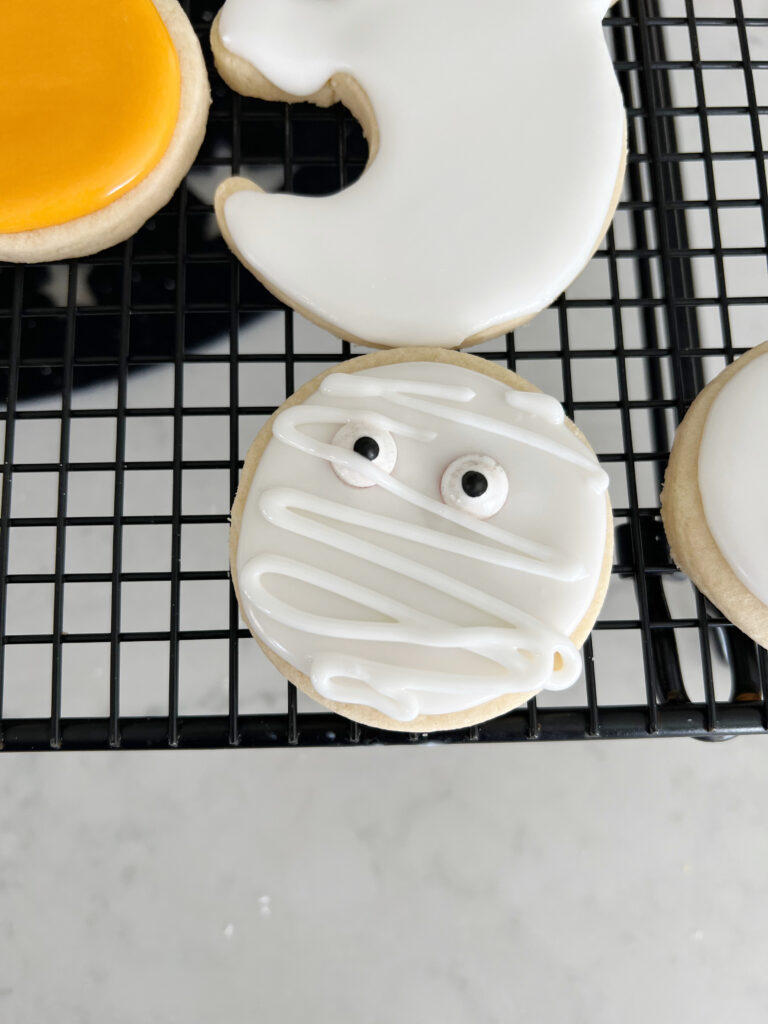
Bonus- Turn your Ghost cookie into a mummy cookie
Sometimes you want to add a bit more dimension to your ghost cookie. If you want a bit of variety for your party, add squiggles with your white royal icing to turn a ghost into a ghoul or a mummy. I like to use googley eyes for the mummies too.
📖 Recipe

Ghost Sugar Cookies
Equipment
- stand or hand mixer
- measuring spoons
- measuring cups
- baking sheets
- oven+timer
Ingredients
- 1 cup sugar
- 1 cup unsalted butter two sticks or 16 tbsp
- 2 eggs
- 1 teaspoon baking powder
- ½ teaspoon salt
- 3 tablespoon pure vanilla extract
- 3 cups unbleached flour
Royal Icing
- 4¾ cups 4¾ cups powdered sugar 4-5 cups total, I typically start with 3 cups and check consistency as I go
- 2½ tablespoon meringue powder
- ¾ cup water
- 2-3 drops black gel food coloring
- 4-6 drops white gel food coloring
Instructions
Sugar Cookies
- Beat together your sugar and butter until combined. You can use your stand-mixer or a hand-mixer
- Add your eggs and combine. Add remaining ingredients and stir for 1-2 minutes for the dough to really come together. It should stick to the paddle of your mixer attachment when it’s ready and not be sticking to the bowl. *If it is sticking to the bowl you might need to add a bit more flour. It should come off easily with a wooden spoon.
- Divide into two parts and roll out your dough. I use two cookie sheets for this amount. Stack them with parchment paper in between the layers.Put in the fridge for a minimum of 30 minutes. Allowing the dough to chill will help it set up and hold the shape of your cutouts.
- Once the dough has chilled, cut out your shapes and preheat your oven to 350 degrees. Take the first cookie sheet full of shapes and place in the freezer for 7-10 minutes. This minimizes spread.
- Bake for 9-12 minutes. This is a variable that’s really determined by your oven temp and cookie softness preference. Play with it a bit to see what works best for you.Allow the cookies to cool on the cookie sheet, the cookies will finish baking directly on the sheet.
Royal Icing
- Combine powdered sugar and meringue powder in bowl or stand-mixer. Allow to stir for 1-2 minutes to combine.
- Add your corn syrup and water. Run stand mixer for 2-3 minutes to combine.
- Separate into bowls as many colors as you're planning to use, and add your gel food coloring. For ghosts, take a few spoonfuls to make into your black icing and leave the remainder white. You can add a few drops of white food coloring to the base frosting too.
- Bag right away and start decorating!





Claire says
Spooky and sweet!
Elsie larson says
These are adorable!